<?xml version="1.0" encoding="utf-8"?><feed xmlns="http://www.w3.org/2005/Atom" ><generator uri="https://jekyllrb.com/" version="4.4.1">Jekyll</generator><link href="https://h2o-ac.pages.dev/feed.xml" rel="self" type="application/atom+xml" /><link href="https://h2o-ac.pages.dev/" rel="alternate" type="text/html" /><updated>2026-05-07T08:33:49+00:00</updated><id>https://h2o-ac.pages.dev/feed.xml</id><title type="html">Mr Li</title><subtitle>个人的一个技术博客站点，主要用于记录个人在学习过程中遇到的技术问题及解决方法、技术实验，以及一些比较有趣的事情。</subtitle><author><name>zhonger</name></author><entry xml:lang="en"><title type="html">Test en</title><link href="https://h2o-ac.pages.dev/test/test-en.html" rel="alternate" type="text/html" title="Test en" /><published>2022-04-29T10:50:00+00:00</published><updated>2022-04-29T10:50:00+00:00</updated><id>https://h2o-ac.pages.dev/test/test-en</id><content type="html" xml:base="https://h2o-ac.pages.dev/test/test-en.html"><![CDATA[<h2 id="chapter-1">Chapter 1</h2>

<p>This is a test paragraph for internalization.</p>]]></content><author><name>zhonger</name></author><category term="test" /><category term="mathjax" /><summary type="html"><![CDATA[Chapter 1]]></summary></entry><entry><title type="html">H2O-ac theme for Jekyll</title><link href="https://h2o-ac.pages.dev/tech/new-theme-h2o-ac.html" rel="alternate" type="text/html" title="H2O-ac theme for Jekyll" /><published>2021-12-22T11:50:00+00:00</published><updated>2021-12-22T11:50:00+00:00</updated><id>https://h2o-ac.pages.dev/tech/new-theme-h2o-ac</id><content type="html" xml:base="https://h2o-ac.pages.dev/tech/new-theme-h2o-ac.html"><![CDATA[<h2 id="前言">前言</h2>

<p>  正如大家所知，Jekyll <sup id="fnref:1"><a href="#fn:1" class="footnote" rel="footnote" role="doc-noteref">1</a></sup> 是一款高可定制的、非常流行的静态博客生成工具。围绕着 Jekyll 也衍生出了很多优秀的 Jekyll 主题， 由 <a href="https://github.com/kaeyleo">廖柯宇</a> 开发的 <a href="https://github.com/kaeyleo/jekyll-theme-H2O">H2O</a> 主题就是其中之一。极简主义、风格扁平化、卡片式布局、Medium 及知乎专栏的视觉风格等等特点，为我们带来了或许是迄今为止最漂亮的 Jekyll 主题。</p>

<p>  诞生之初，H2O 主题就在 Github 平台上以 MIT 许可证协议开放了源代码。这吸引了很多小伙伴纷纷转投 Jekyll 和 H2O 主题的阵营，本人也是其中之一。随着使用者越来越多，不少的小伙伴在使用过程中发现了一些小问题并主动修复，最后贡献到了 H2O 的主项目，这让 H2O 主题变得更好。本人在使用过程中也的确是发现了一些与自己实际需求不大一致的地方，并且在原 H2O 主题的基础上做了一些改动。考虑到这些改动可能并不是大多数人的需求，直接向原 H2O 主题提交 pull 请求合并的必要性不大，因此决定将原项目 fork 并改名。现正式将源代码以与 H2O 主题相同的 MIT 许可证协议在 Github 平台上公开，新项目地址为 <a href="https://github.com/zhonger/jekyll-theme-H2O-ac">zhonger/jekyll-theme-H2O-ac</a>。</p>

<p>  在此，非常感谢廖柯宇及其他小伙伴对于 H2O-ac 主题的基础主题 H2O 的代码开发和开放共享。</p>

<h2 id="新特性">新特性</h2>

<h3 id="更适合学术人和运维程序员的页面结构">更适合学术人和运维程序员的页面结构</h3>

<p>  H2O 主题其实在很大程度上已经满足了大部分人的需求，只是对于学术研究人员和运维程序员来说，个人觉得页面结构还是有点不够合适。学术研究人员比较重视在首页直接展示个人信息和研究情况，能够让人很快地了解到所需的信息，这其实是将 About me 这样一个平常的辅助页面当成了主页面来用。另外，运维程序员比较重视能一览所有文章的标题以迅速找到感兴趣的文章。虽然搜索功能、标签页、卡片展示页都能够列出所有的文章，但个人觉得还是不够简洁、方便。而像 Hexo 静态生成工具自带的 Archive 归档页面比较能满足这样的需求。除此之外，整个博客的系统日志变迁记录对于运维程序员来说也非常重要，毕竟如果通过发布一篇文章来描述变迁过程并不适合联系起来完整了解。如果有系统日志页，就可以按照年份、月份、事件的先后进行简要的描述，并且一览无遗。</p>

<p>  因此，在 H2O-ac 主题中，从原来 H2O 的主页中抽出框架做成了页面模板。根据实际页面的内容需求，增加了<strong>学术首页</strong>、<strong>归档页</strong>和<strong>系统日志页</strong>。</p>

<h4 id="学术首页">学术首页</h4>

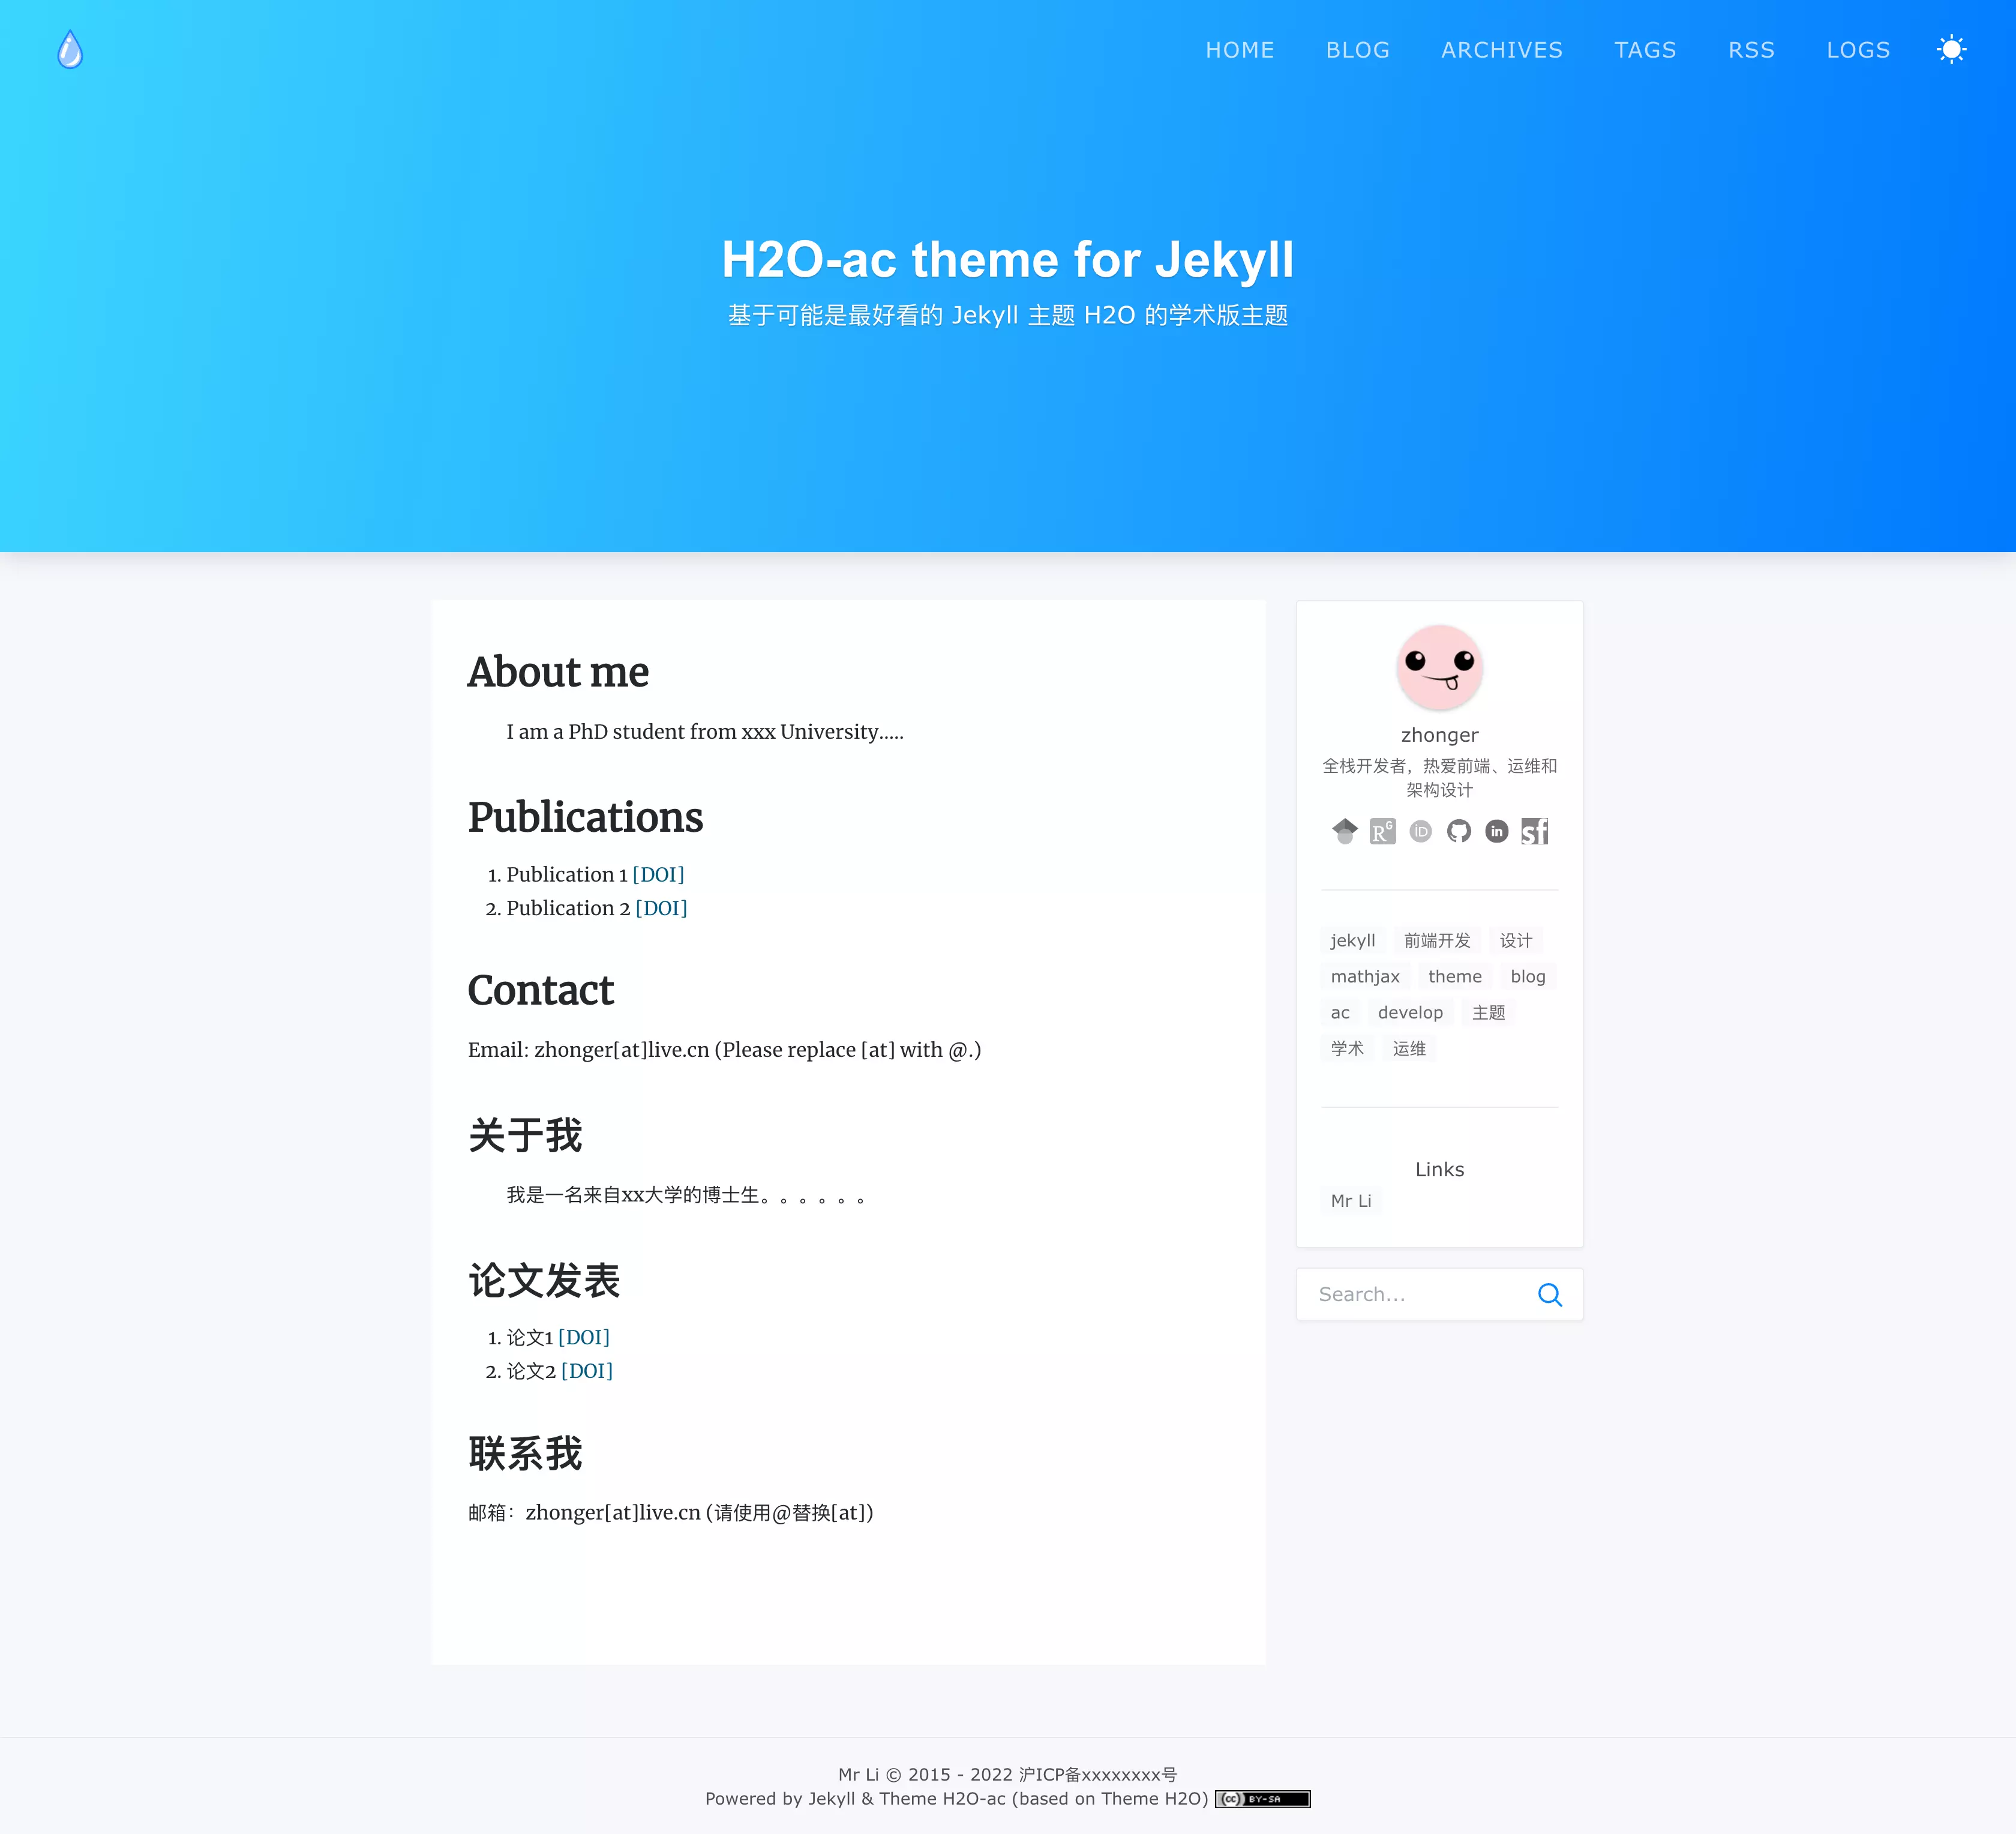
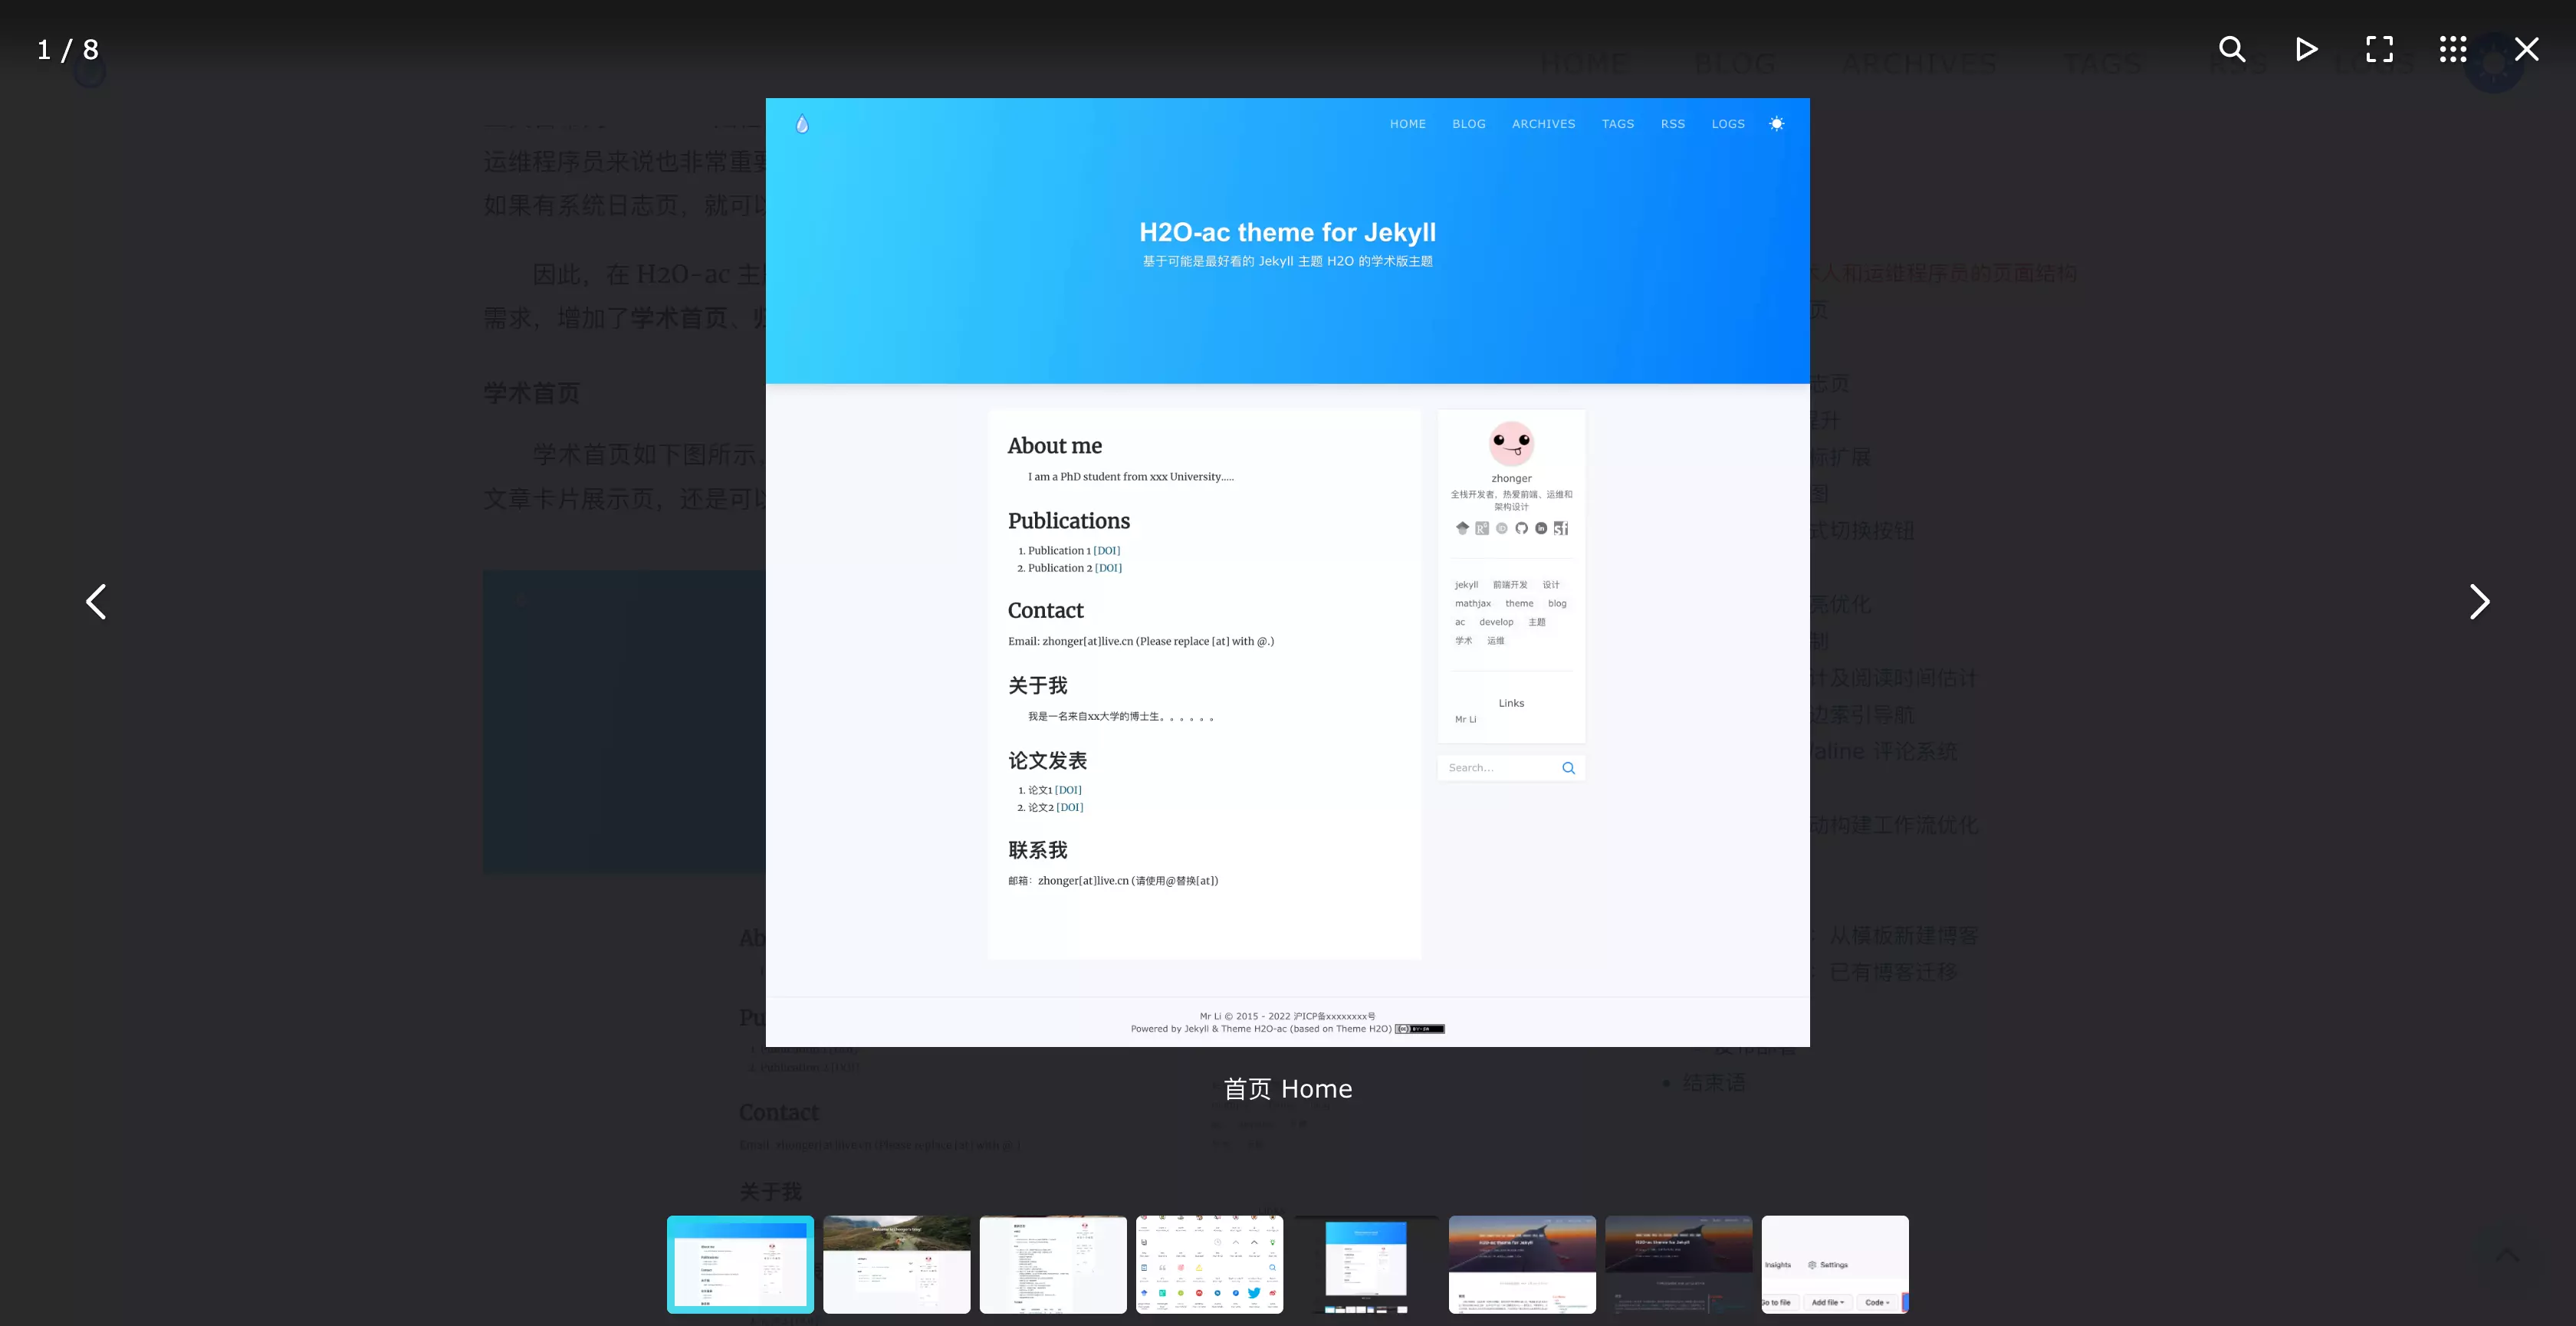
<p>  学术首页如下图所示，并将原来 H2O 中的卡片首页移动到 blog 子目录下了。如果读者想要看到文章卡片展示页，还是可以点击顶部的导航栏中的 BLOG 直接访问。</p>

<p><img src="https://i.lisz.top/blog/XyT038.webp" alt="首页 Home" /></p>

<h4 id="归档页">归档页</h4>

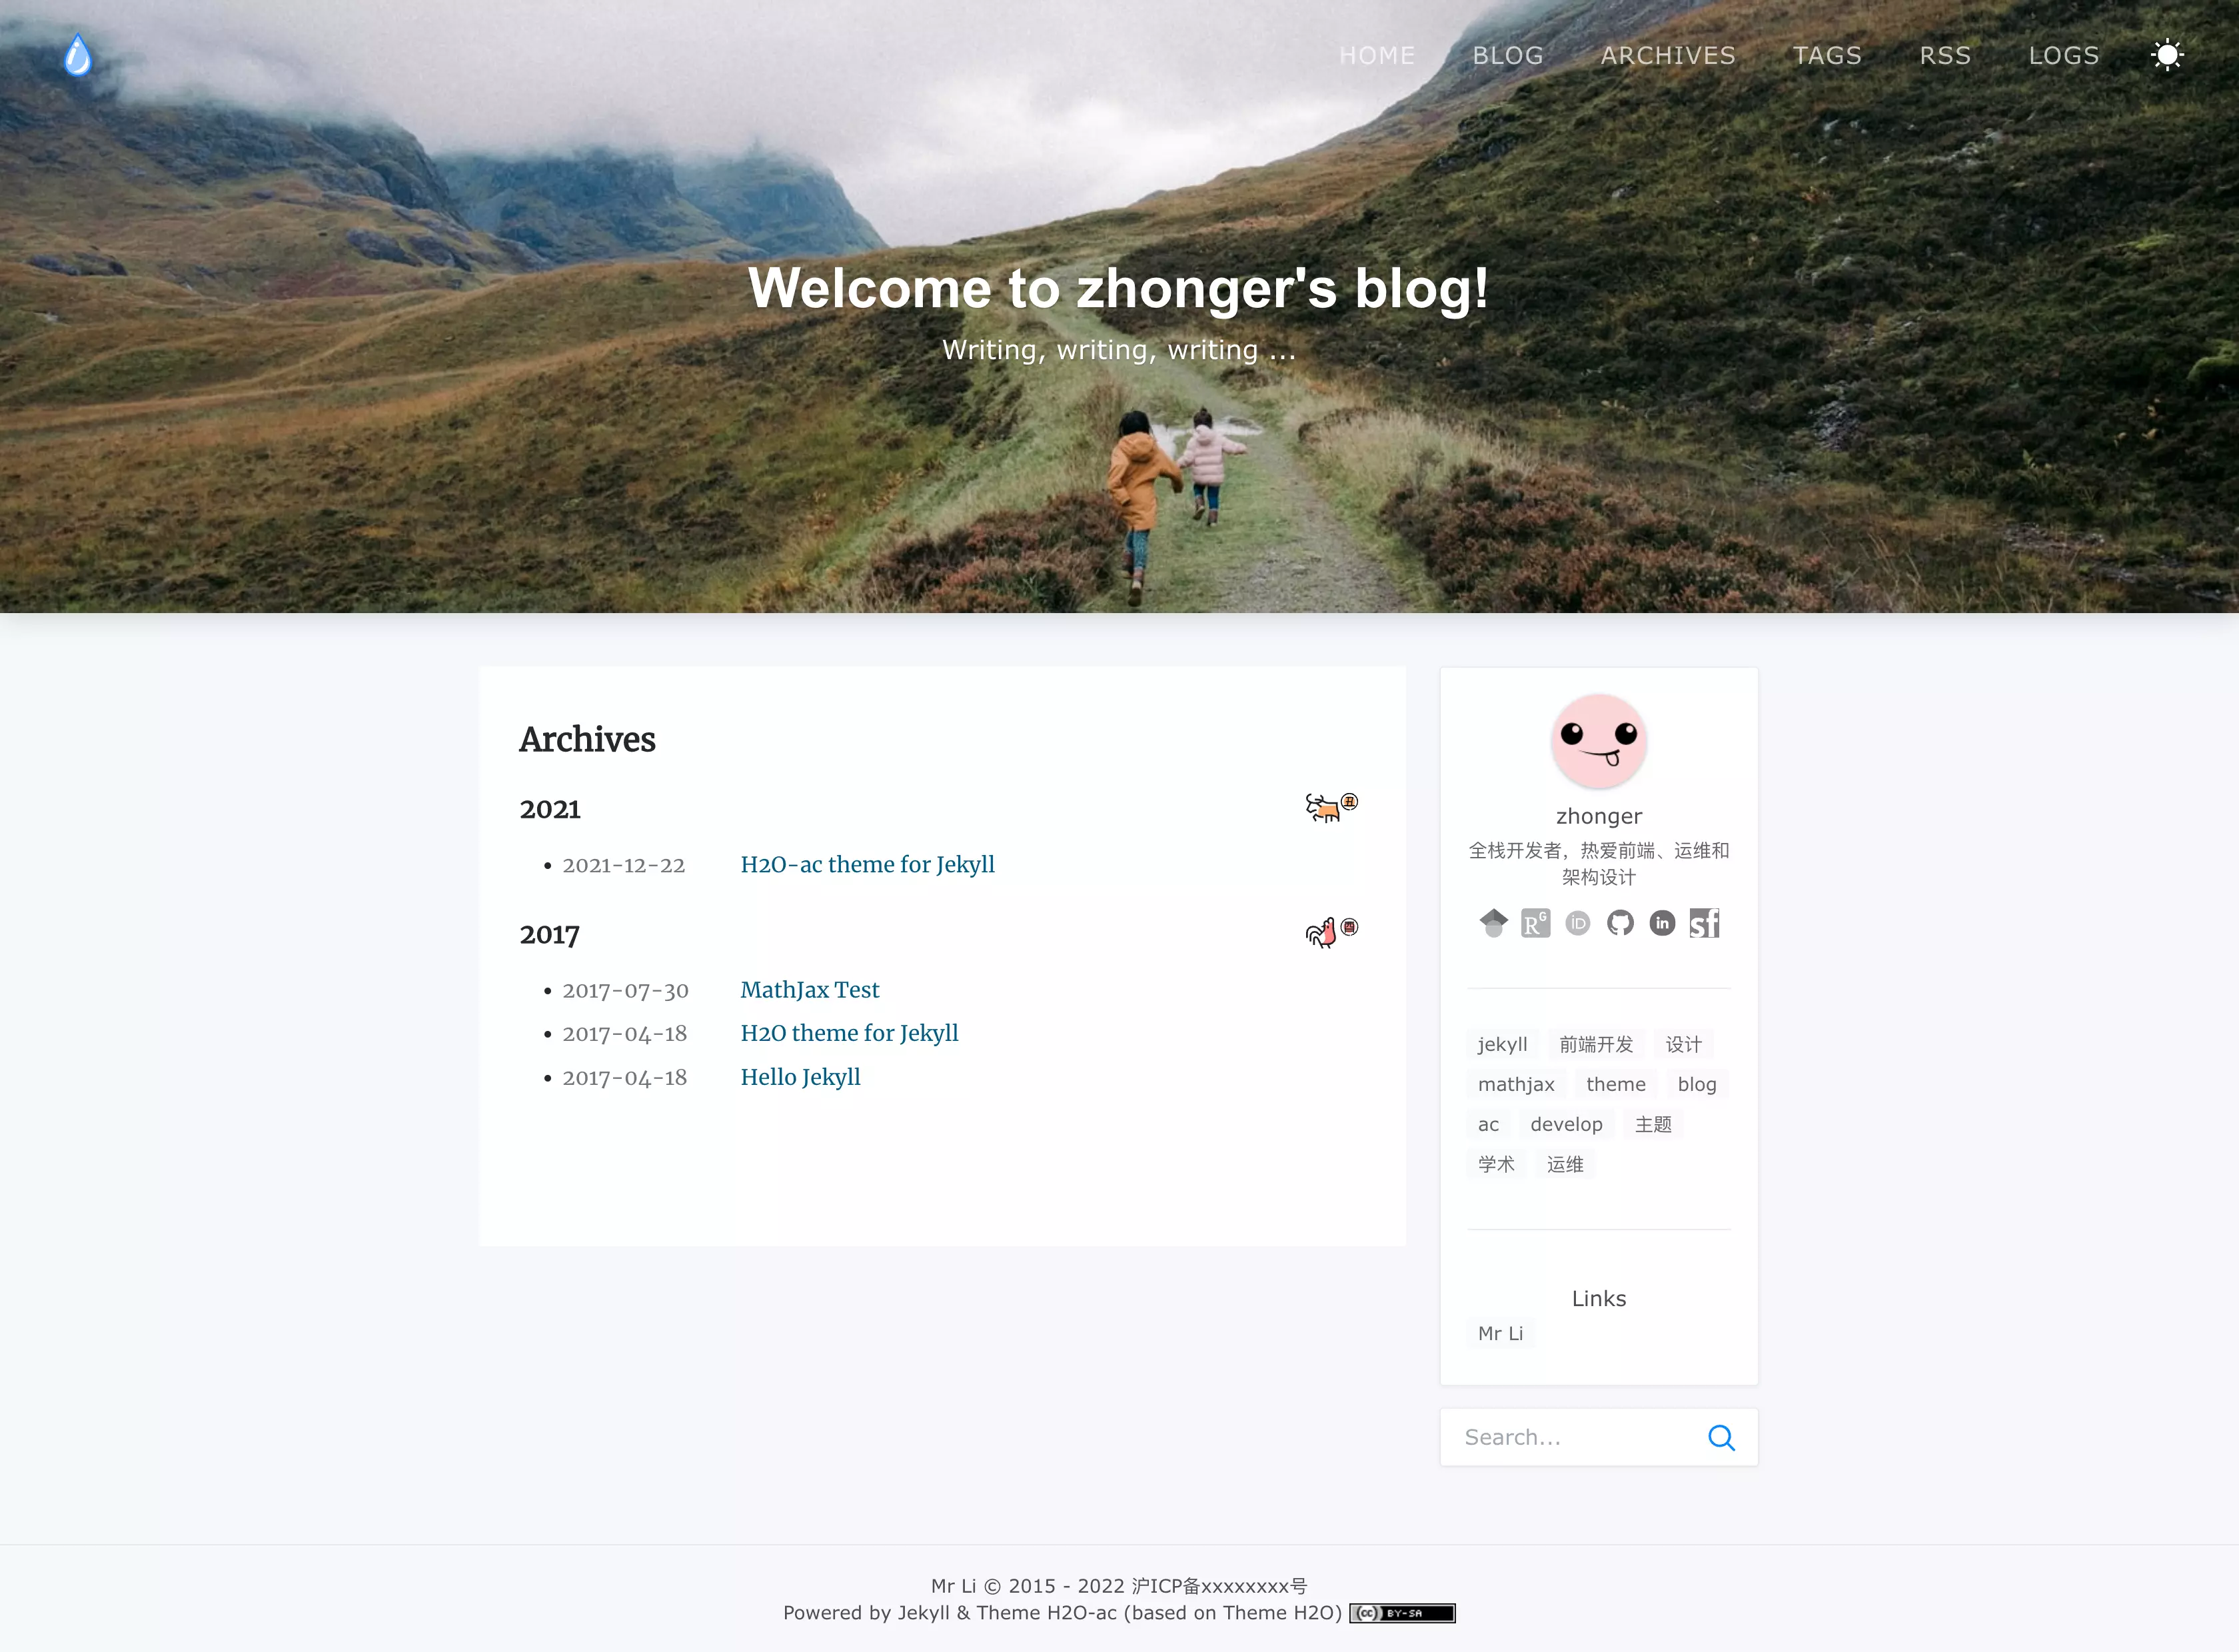
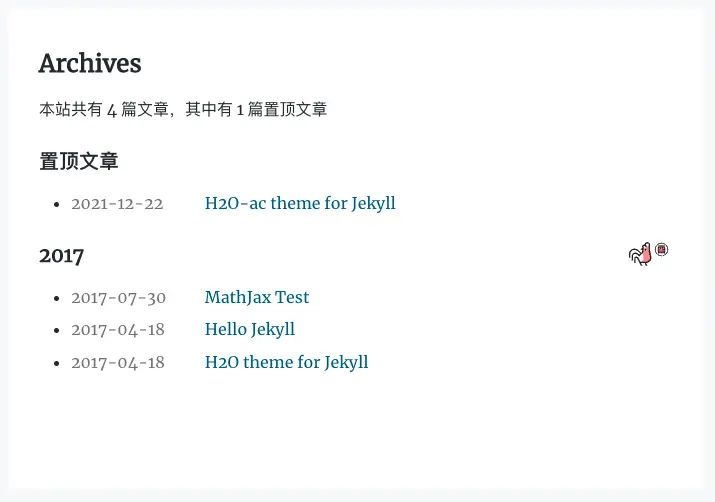
<p>  归档页设置为由 Jekyll 按照模板自动生成，以年份、日期、文章标题分级列表展示，简洁清晰。</p>

<p><img src="https://i.lisz.top/blog/lj4vUP.webp" alt="归档页 Archives" /></p>

<h4 id="系统日志页">系统日志页</h4>

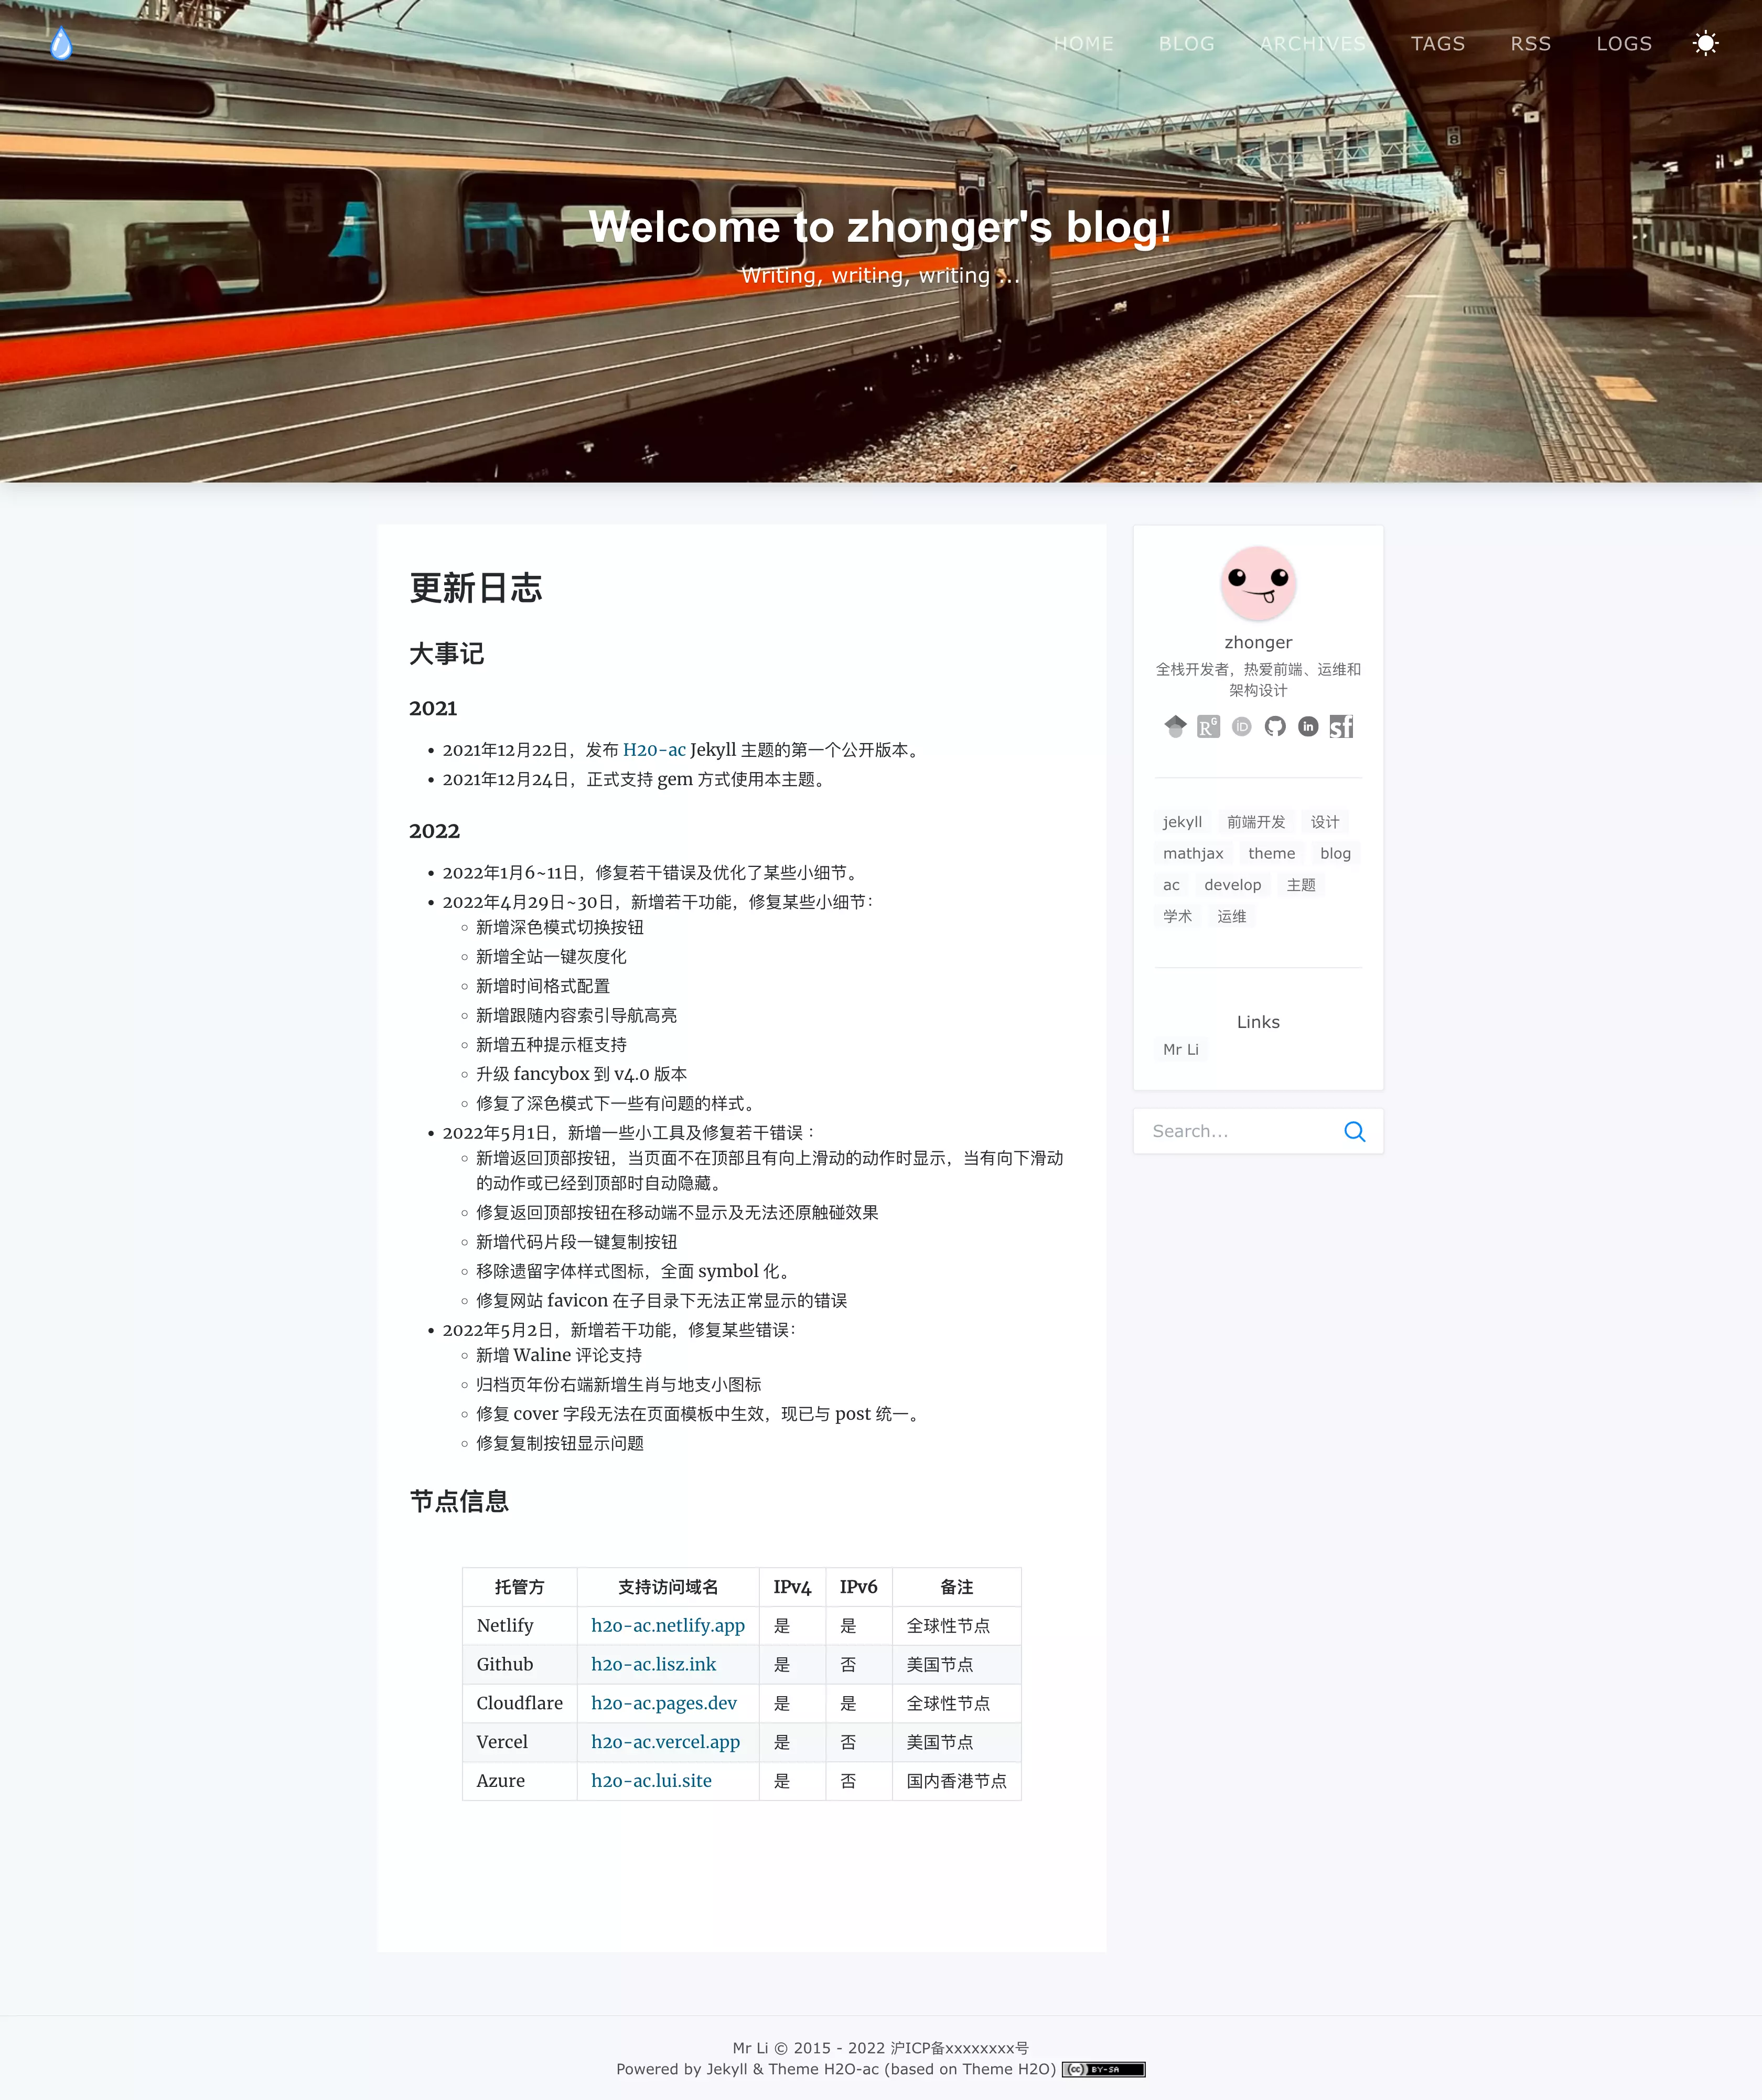
<p>  系统日志页其实也不是经常更新的，只有在博客整体作出设置或改进的才加以说明。另外，也可以将一些固定的站点信息放置在系统日志页，比如站点的多点部署信息，读者可以根据此信息访问最快、最合适的节点。</p>

<p><img src="https://i.lisz.top/blog/7QLEc6.webp" alt="系统日志 Log" /></p>

<h3 id="使用体验提升">使用体验提升</h3>

<p>  廖柯宇也在 H2O 主题的默认页面中写道，目前 H2O 主题还有一些可优化的内容，比如夜间模式、查看大图等。这里，根据个人的一些实际需求和了解，在 H2O-ac 主题中做了调整。</p>

<h4 id="社交图标扩展">社交图标扩展</h4>

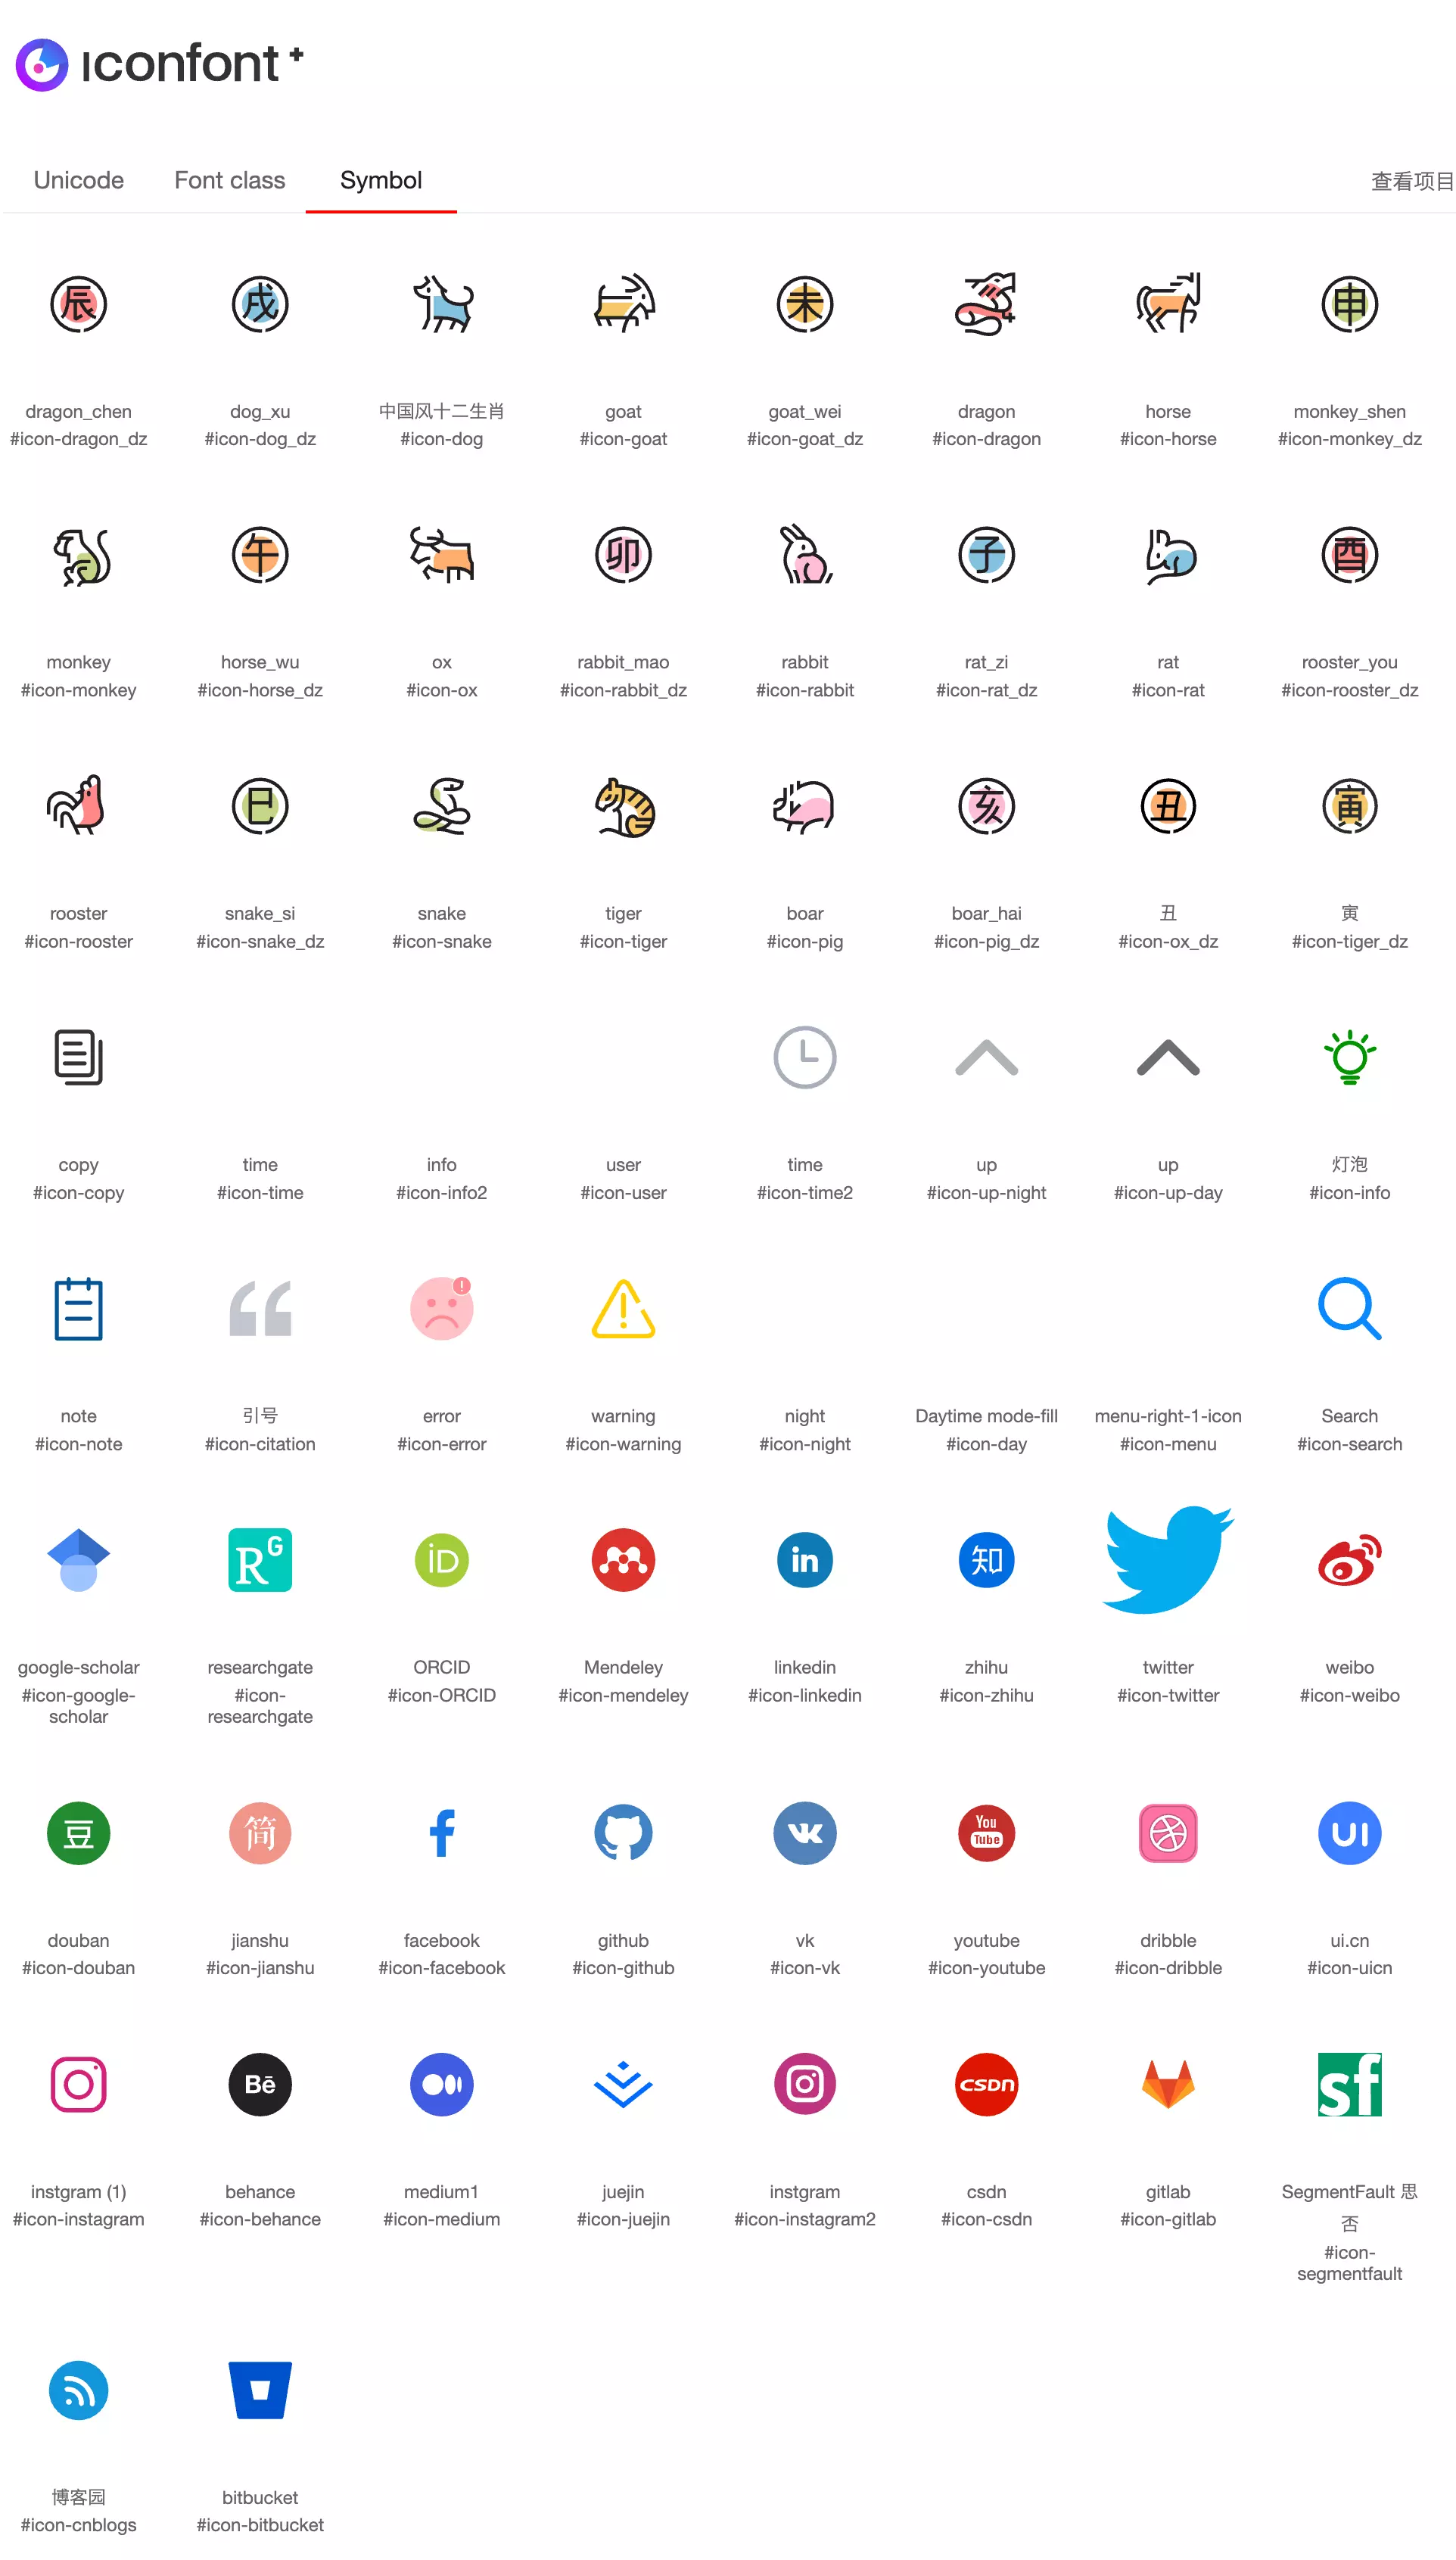
<p>  H2O 原有的社交图标其实已经比较广泛，只是还有些领域局限性，比如学术研究人员可能更希望展示谷歌学术、ResearchGate、ORCID 等社交图标及链接，而运维开发人员可能更希望展示 SegmentFault、CSDN、博客园等社交图标及链接。这里在 H2O 提供的社交图标类型基础上做了这些平台图标的扩充，同时尝试了 Symbol 引用的方式来实现社交图标鼠标悬停的效果，从而简化代码（H2O 采用的是字体图标的方式，需要为每一个社交图标定义不同的主题色）。</p>

<p><img src="https://i.lisz.top/blog/UpnQdk.webp" alt="社交图标 SNS" /></p>

<h4 id="查看大图">查看大图</h4>

<p>  查看大图功能的确对于读者的阅读体验来说有很大的提升。就像我们阅读文献一样，可能首先会只看文章附图来大致掌握文章的核心点。博文的查看大图功能也可能有这样的异曲同工之妙。这里是采用的 <a href="https://fancyapps.com/docs/ui/fancybox">Fancybox</a> 插件实现的。H2O-ac 主题中只使用了最简单的配置，用户可以根据需求查看文档做出更多的修改。</p>

<p><img src="https://i.lisz.top/blog/BzfBoz.webp" alt="查看大图 Fancybox" /></p>

<p>(2022年4月30日更新)</p>

<p>  由于 fancybox 库作者对原使用的 v3.5.7 版本不再进行维护和更新，现将版本更新至新的 v4.0 版本，即 <a href="https://github.com/fancyapps/ui">fancyapps/ui</a>。另，新增将 alt 内容作为图片的描述显示在 fancybox 中。</p>

<h4 id="深色模式切换按钮">深色模式切换按钮</h4>

<p>(2022年4月30日更新)</p>

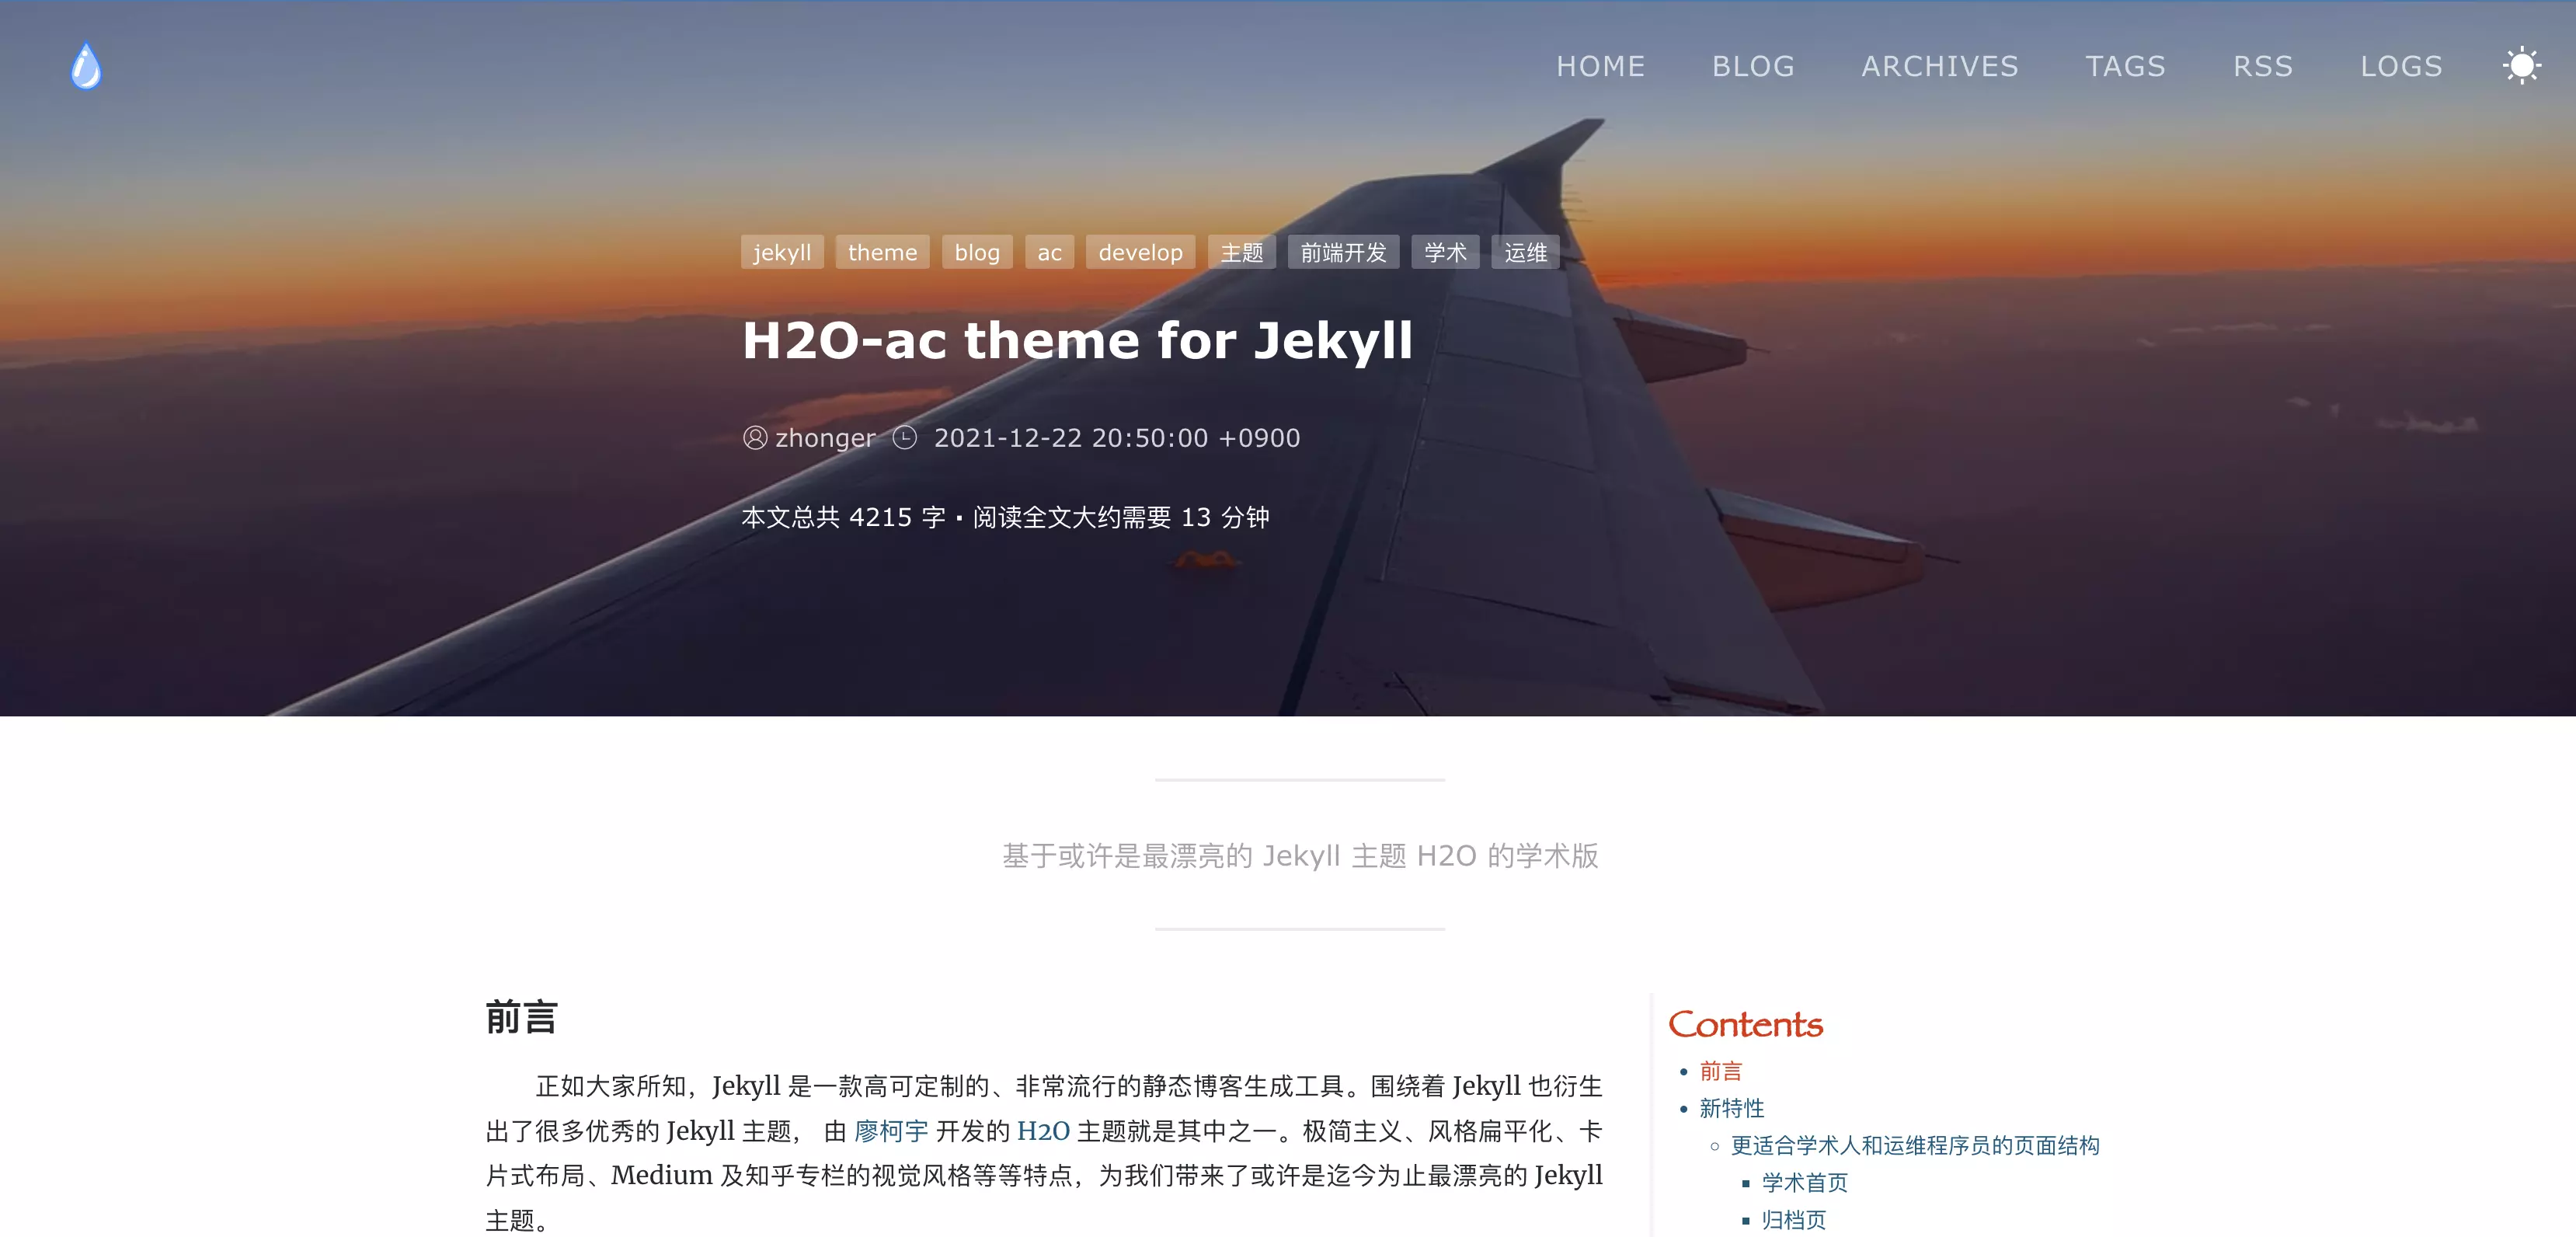
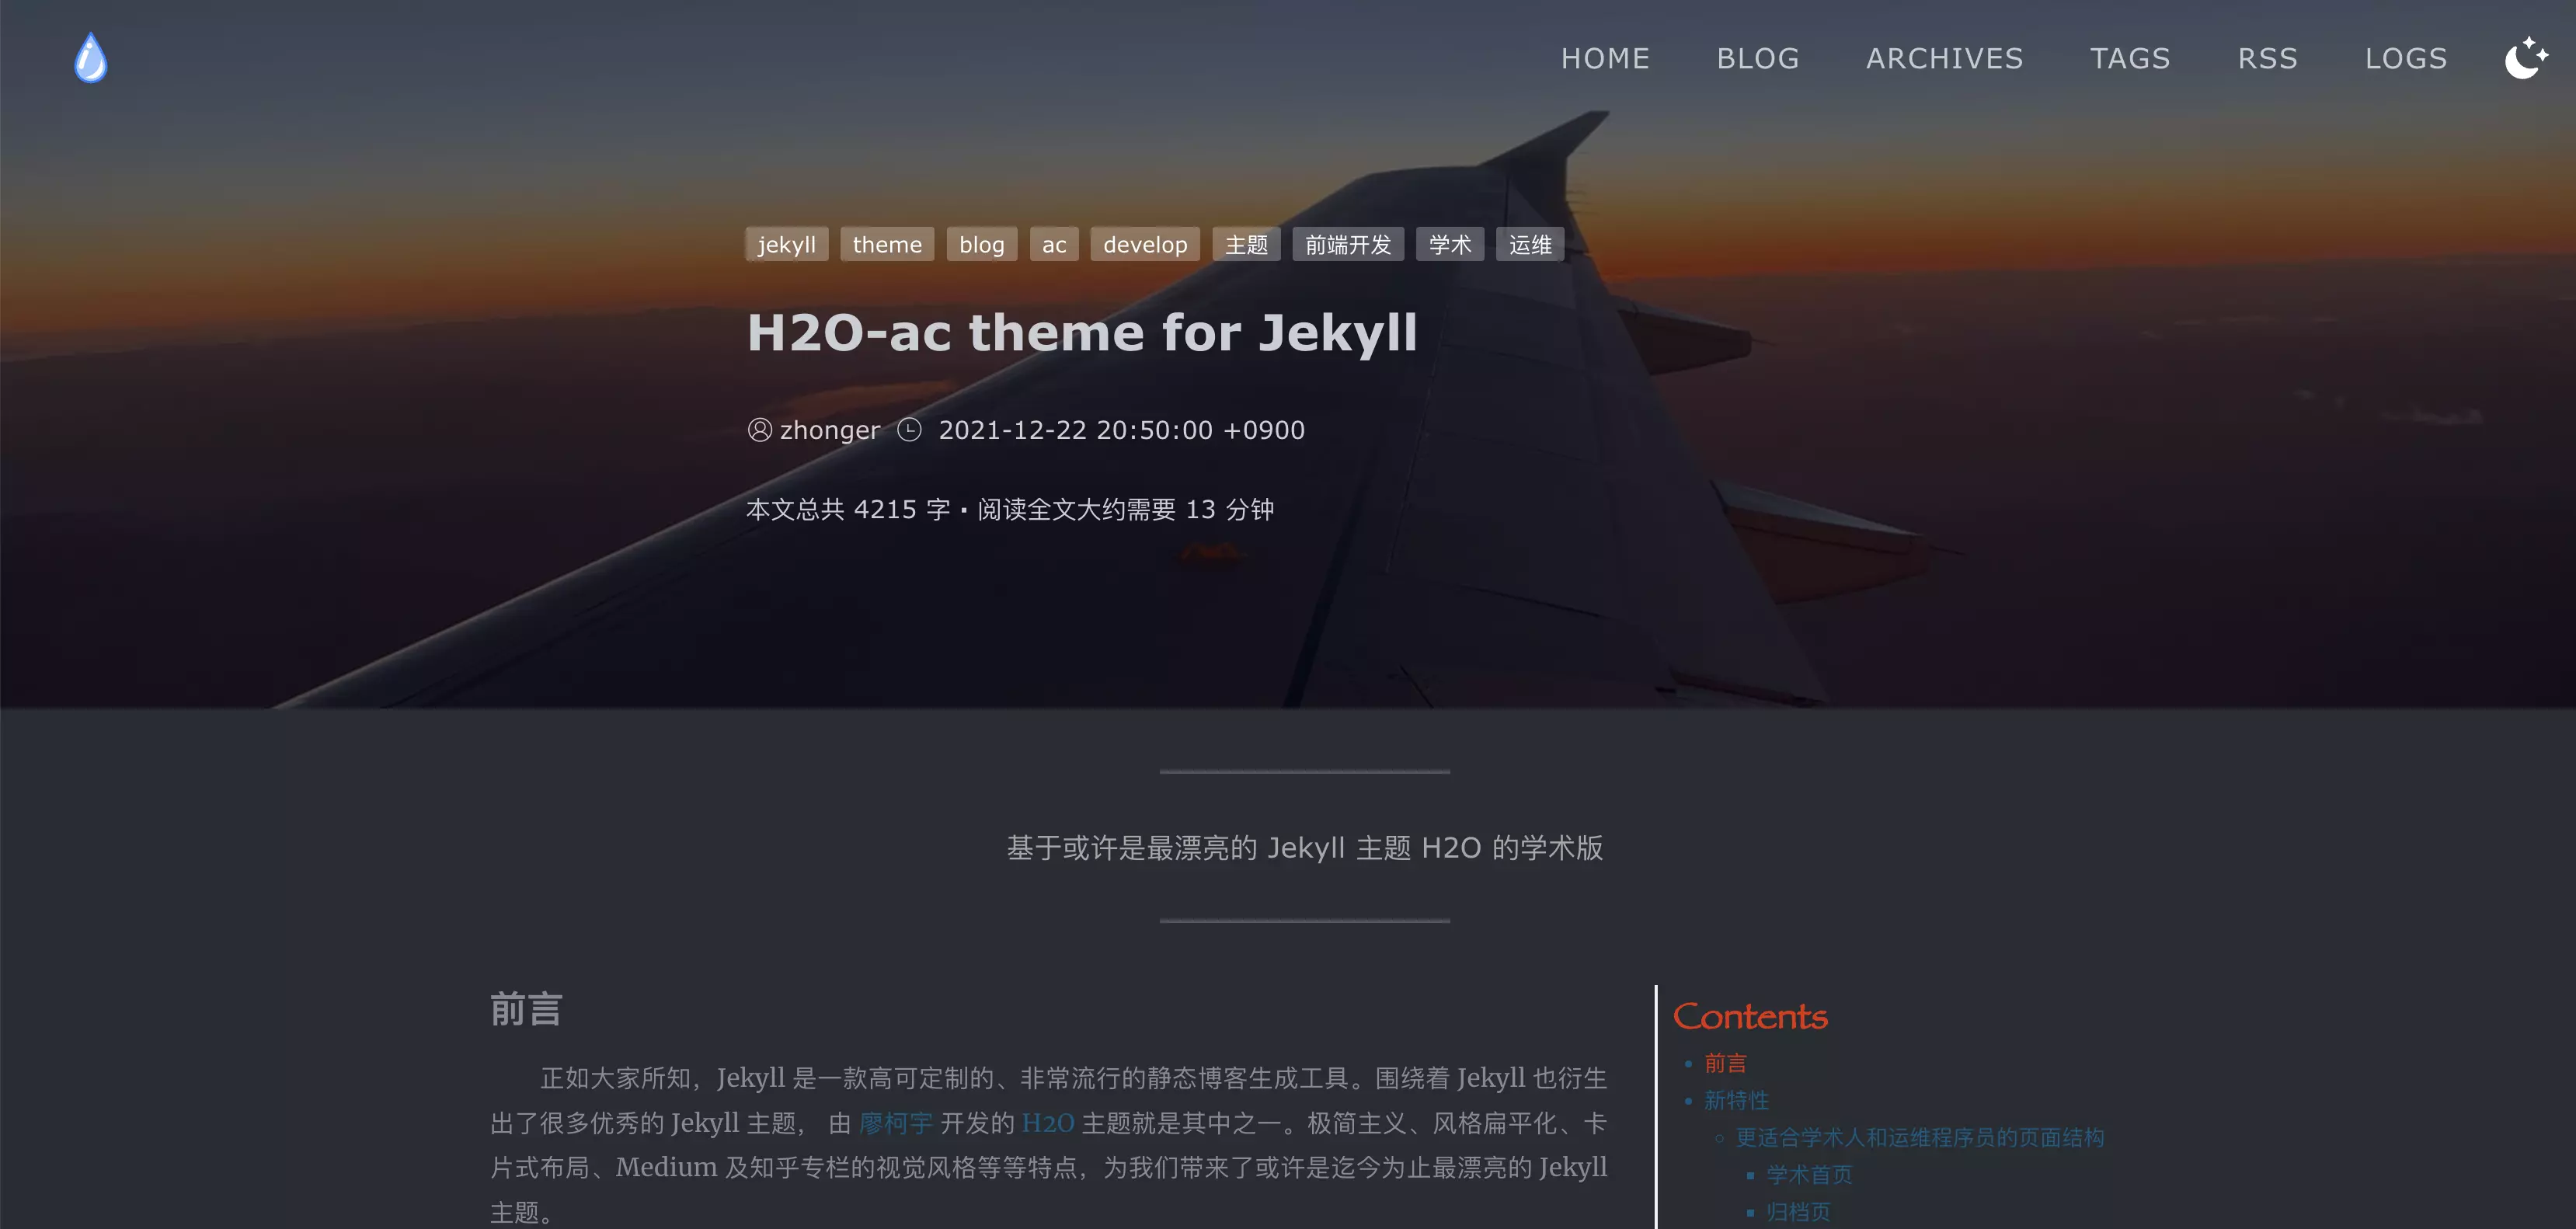
<p>  原来 H2O 主题的深色模式切换需要在 _config.yml 文件中配置开启，并且只能在固定时间段使用。此次更新在页面右上角提供了深色/浅色模式一键切换按钮，如下图所示。由于更新了深色模式采用 cookie 的方式来确定，此深色模式切换按钮可以与原来的深色模式配置共存。</p>

<p><img src="https://i.lisz.top/blog/EPhFN9.webp" alt="浅色模式 Day mode" /></p>

<p><img src="https://i.lisz.top/blog/BD7BqC.webp" alt="深色模式 Night mode" /></p>

<h4 id="提示框">提示框</h4>

<p>(2022年4月30日更新)</p>

<p>  通过引入 <a href="https://github.com/lazee/premonition">lazee/premonition</a> 库新增五种提示框：笔记、提示、警告、错误、引用，完全兼容原生 Markdown 语法，并对样式进行了主题适应。以下为五种提示框的实际效果。</p>

<div class="premonition note"> <div class="header"> <svg class="icon note" aria-hidden="true"> <use xlink:href="#icon-note"></use> </svg> <div class="title"> Note </div> </div> <div class="content"> <p>The body of the note goes here. Premonition allows you to write any <code class="language-plaintext highlighter-rouge">Markdown</code> inside the block.</p>


 </div> </div>
<div class="premonition info"> <div class="header"> <svg class="icon info" aria-hidden="true"> <use xlink:href="#icon-info"></use> </svg> <div class="title"> 小提示 </div> </div> <div class="content"> <p>The body of the info goes here. Premonition allows you to write any <code class="language-plaintext highlighter-rouge">Markdown</code> inside the block.</p>


 </div> </div>
<div class="premonition warning"> <div class="header"> <svg class="icon warning" aria-hidden="true"> <use xlink:href="#icon-warning"></use> </svg> <div class="title"> Warning </div> </div> <div class="content"> <p>The body of the warning goes here. Premonition allows you to write any <code class="language-plaintext highlighter-rouge">Markdown</code> inside the block.</p>


 </div> </div>
<div class="premonition error"> <div class="header"> <svg class="icon error" aria-hidden="true"> <use xlink:href="#icon-error"></use> </svg> <div class="title"> Error </div> </div> <div class="content"> <p>The body of the error goes here. Premonition allows you to write any <code class="language-plaintext highlighter-rouge">Markdown</code> inside the block.</p>


 </div> </div>
<div class="premonition citation"> <div class="header"> <svg class="icon citation" aria-hidden="true"> <use xlink:href="#icon-citation"></use> </svg> </div> <div class="content"> <p>To be or not to be is a question. <code class="language-plaintext highlighter-rouge">Markdown</code></p>


 </div> <div class="ref"> ------ 莎士比亚 </div> </div>
<h4 id="代码高亮优化">代码高亮优化</h4>

<p>  本人使用 H2O 主题的时候代码高亮功能还是沿用的 Jekyll 自带的，后来 H2O 主题也开始采用了 <a href="https://prismjs.com/">Prism.js</a>。不过由于使用的是 <code class="language-plaintext highlighter-rouge">OKAIDIA</code> 高亮主题，所以有些段落中的格式化字段显示上有些问题。这里，仍然采用默认主题，并且扩增到 Prism.js 支持的所有编程语言类型。效果可以从前一句的 OKAIDIA 字段和下面即将出现的代码片段看出。</p>

<div class="language-css highlighter-rouge"><div class="highlight"><pre class="highlight"><code><span class="k">@font-face</span> <span class="p">{</span>
  <span class="nl">font-family</span><span class="p">:</span> <span class="s2">'Merriweather'</span><span class="p">;</span>
  <span class="nl">src</span><span class="p">:</span> <span class="n">local</span><span class="p">(</span><span class="s2">'Merriweather'</span><span class="p">),</span> <span class="nf">url</span><span class="p">(</span><span class="n">https</span><span class="p">:</span><span class="o">//</span><span class="n">fonts</span><span class="p">.</span><span class="n">gstatic</span><span class="p">.</span><span class="n">com</span><span class="o">/</span><span class="p">...)</span> <span class="nf">format</span><span class="p">(</span><span class="s2">'woff2'</span><span class="p">);</span>
<span class="p">}</span>
</code></pre></div></div>

<p>(2022年5月14日更新)</p>

<p>  更换 Prism 库加载方式，采用按需自动加载代码类型，尽可能减少因 Prism 造成的阻塞。修复了某些样式问题。增加显示行数支持、官方主题选择支持。如下所示可以进行设置，具体主题风格样式可以访问 <a href="https://prismjs.com/">Prism 官网</a> 了解更多。</p>

<p>(2022年5月23日更新)</p>

<p>  除官方代码库中默认代码主题外，新增扩展代码主题支持，比如常用的 One Light 等等。具体主题风格样式可以查看 <a href="https://github.com/PrismJS/prism-themes/tree/master/themes">PrismJS/prism-themes</a> 了解更多。</p>

<div class="language-yaml highlighter-rouge"><div class="highlight"><pre class="highlight"><code><span class="c1"># Prism</span>
<span class="na">prism</span><span class="pi">:</span>
  <span class="na">theme</span><span class="pi">:</span> <span class="s">tomorrow</span>
  <span class="na">line_numbers</span><span class="pi">:</span> <span class="kc">true</span>
</code></pre></div></div>

<h4 id="代码复制">代码复制</h4>

<p>(2022年5月1日更新)</p>

<p>  由于主题设置有复制自动添加版权保护文字，导致复制代码或无法直接使用。但是如果直接去掉版权保护又不大合适，于是新增代码复制功能。当使用如下所示代码片段右上角的复制按钮时，代码会被复制到粘贴板，且不包含版权保护文字，可以放心直接使用。</p>

<p>(2022年5月14日更新)</p>

<p>  调整复制按钮位置，自动识别代码块的代码类型并显示。</p>

<div class="language-html highlighter-rouge"><div class="highlight"><pre class="highlight"><code><span class="c">&lt;!-- Target --&gt;</span>
<span class="nt">&lt;input</span> <span class="na">id=</span><span class="s">"foo"</span> <span class="na">value=</span><span class="s">"https://github.com/zenorocha/clipboard.js.git"</span><span class="nt">&gt;</span>

<span class="c">&lt;!-- Trigger --&gt;</span>
<span class="nt">&lt;button</span> <span class="na">class=</span><span class="s">"btn"</span> <span class="na">data-clipboard-target=</span><span class="s">"#foo"</span><span class="nt">&gt;</span>
    <span class="nt">&lt;img</span> <span class="na">src=</span><span class="s">"assets/clippy.svg"</span> <span class="na">alt=</span><span class="s">"Copy to clipboard"</span><span class="nt">&gt;</span>
<span class="nt">&lt;/button&gt;</span>
</code></pre></div></div>

<h4 id="文章置顶功能">文章置顶功能</h4>

<p>(2022年5月26日更新)</p>

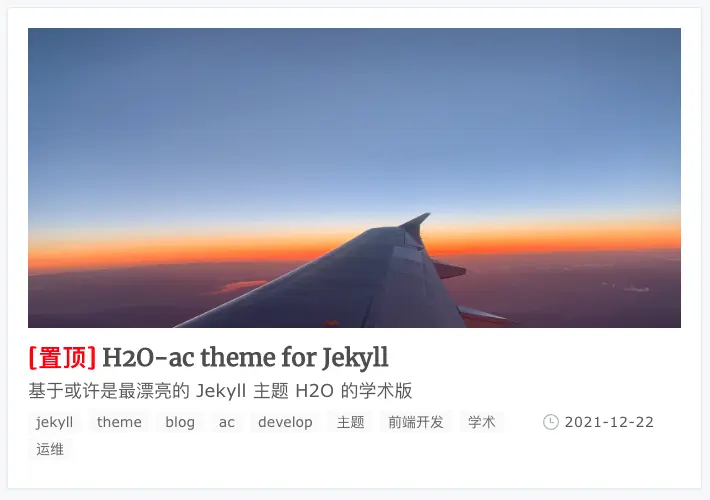
<p>  鉴于现有的 Jekyll 文章置顶库有点年久失修，决定徒手实现了一下文章置顶功能。具体文章列表页和归档页置顶效果如下所示：</p>

<p><img src="https://i.lisz.top/blog/mcF2Z3.webp" alt="文章置顶 Top acticles" />
<img src="https://i.lisz.top/blog/yajcoi.webp" alt="归档页文章置顶 Top acticles in archives" /></p>

<h4 id="分页依赖升级">分页依赖升级</h4>

<p>(2022年5月26日更新)</p>

<p>  由于原有的 jekyll-paginate 库已停止更新，所以升级到目前更新、维护活跃的 <a href="https://github.com/sverrirs/jekyll-paginate-v2">jekyll-paginate-v2</a> 库。原有的分页配置自 v1.1.7 版本后无法使用，请更换为如下类似设置：</p>

<div class="language-yaml highlighter-rouge"><div class="highlight"><pre class="highlight"><code><span class="c1"># _config.yml 旧配置</span>
<span class="na">paginate</span><span class="pi">:</span> <span class="m">10</span>
<span class="na">paginate_path</span><span class="pi">:</span> <span class="s1">'</span><span class="s">blog/page:num'</span>

<span class="c1"># _config.yml 新配置</span>
<span class="na">pagination</span><span class="pi">:</span>
  <span class="na">enabled</span><span class="pi">:</span> <span class="kc">true</span>
  <span class="na">per_page</span><span class="pi">:</span> <span class="m">10</span>
  <span class="na">permalink</span><span class="pi">:</span> <span class="s1">'</span><span class="s">page:num/'</span>
</code></pre></div></div>

<p>  另外，blog/index.html 的头部信息中应该加上如下<strong>启用分页</strong>的配置。否则，jekyll-paginate-v2 不会主动工作。</p>

<div class="language-yaml highlighter-rouge"><div class="highlight"><pre class="highlight"><code><span class="na">pagination</span><span class="pi">:</span> 
  <span class="na">enabled</span><span class="pi">:</span> <span class="kc">true</span>
</code></pre></div></div>

<h4 id="封面图片作者及链接">封面图片作者及链接</h4>

<p>(2022年5月26日更新)</p>

<p>  一直以来封面图片都是来自 <a href="https://unsplash.com">Unsplash</a> 的免费高清图片，为了表明封面图片的来源和作者，现在文章的元信息中添加了对封面图片作者及链接的支持。如果想要声明，可以直接在文章的头部信息中添加如下配置：</p>

<div class="language-yaml highlighter-rouge"><div class="highlight"><pre class="highlight"><code><span class="s">......</span>
<span class="na">cover</span><span class="pi">:</span> <span class="s1">'</span><span class="s">'</span>
<span class="na">cover_author</span><span class="pi">:</span> <span class="s1">'</span><span class="s">'</span>
<span class="na">cover_author_link</span><span class="pi">:</span> <span class="s1">'</span><span class="s">'</span>
<span class="s">......</span>
</code></pre></div></div>

<p>  非文章的页面中也可以像上面那样声明相关的封面作者及链接，效果如下所示：</p>

<p><img src="https://i.lisz.top/blog/fzWjPs.webp" alt="页面封面图片信息 Cover author for pages" /></p>

<h4 id="字数统计及阅读时间估计">字数统计及阅读时间估计</h4>

<p>  字数统计及阅读时间估计这个小功能其实以前在用 WordPress 的时候比较常见。虽然说统计和估计的结果不一定完全准确，但是还是起到了一定的辅助阅读的作用。效果可以查看本页标题下的基本信息区域。</p>

<h4 id="时间本地化与最近更新时间">时间本地化与最近更新时间</h4>

<p>(2022年5月22日更新)</p>

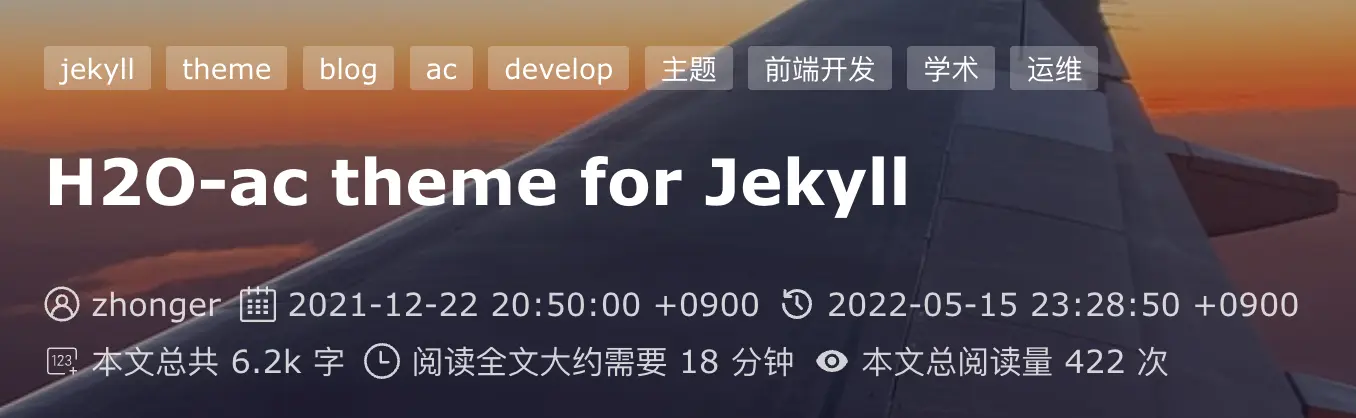
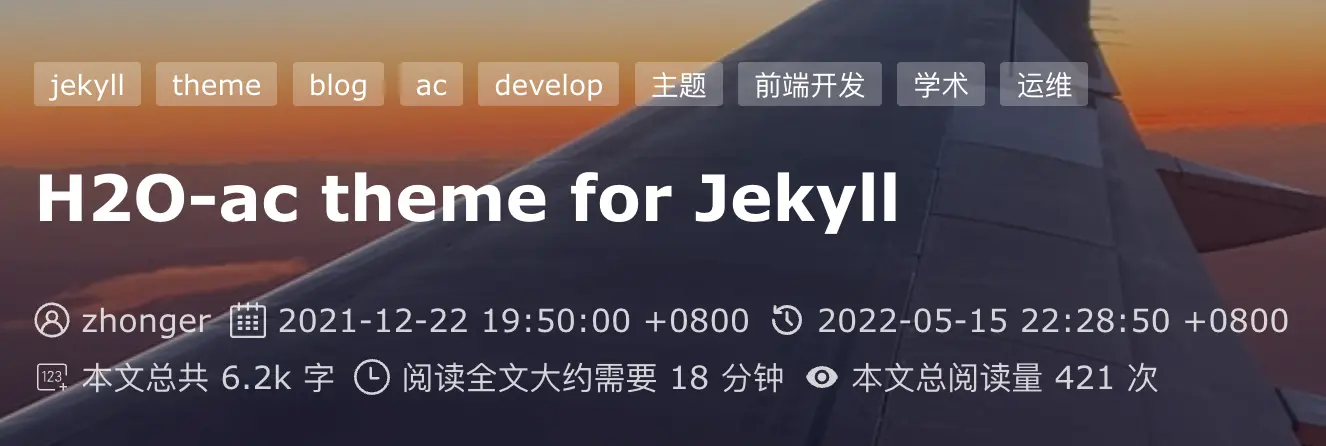
<p>  为了支持来自不同时区的读者直接可以看到文章发布对应的本地时间，现已利用 dayjs 新增<strong>时间本地化</strong>功能。并利用 Github API 查询页面的最近一次 commit 更新时间作为文章<strong>最近更新时间</strong>。效果如下图所示。</p>

<p><img src="https://i.lisz.top/blog/Anb4xH.webp" alt="构建位置时区 Jekyll deployment timezone" />
<img src="https://i.lisz.top/blog/NMPXmQ.webp" alt="读者时区 Reader timezone" /></p>

<p>  如需使用<strong>最近更新时间</strong>功能，务必在 _config.yml 文件中添加以下配置项：</p>

<div class="language-yaml highlighter-rouge"><div class="highlight"><pre class="highlight"><code><span class="c1"># Github</span>
<span class="na">github</span><span class="pi">:</span>
  <span class="na">enabled</span><span class="pi">:</span> <span class="kc">true</span>
  <span class="na">owner</span><span class="pi">:</span> <span class="s">github_username</span>
  <span class="na">repository</span><span class="pi">:</span> <span class="s">github_project_name</span>
</code></pre></div></div>

<p>  如未正确进行以上配置，默认会将最近更新时间与发布时间保持一致。</p>

<h4 id="版权显式声明">版权显式声明</h4>

<p>(2022年5月18日更新)</p>

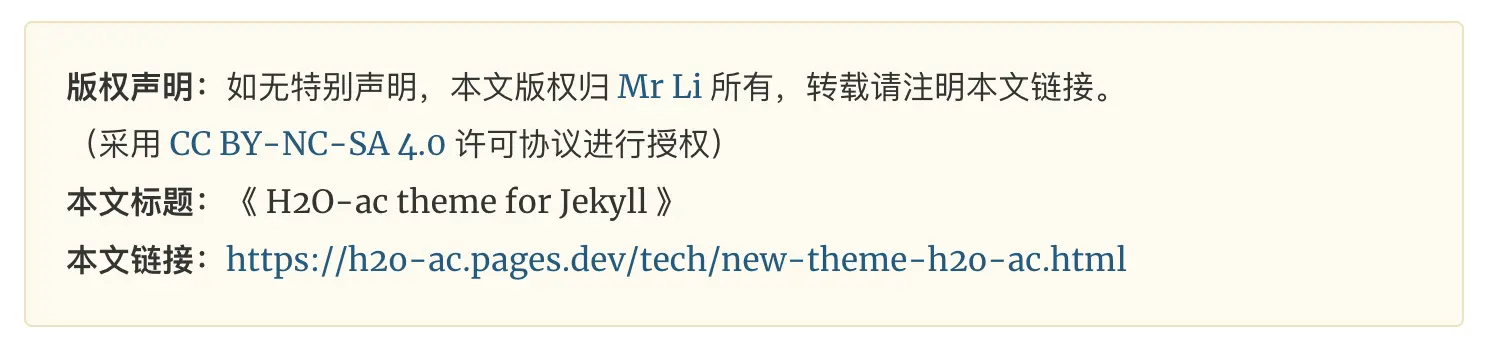
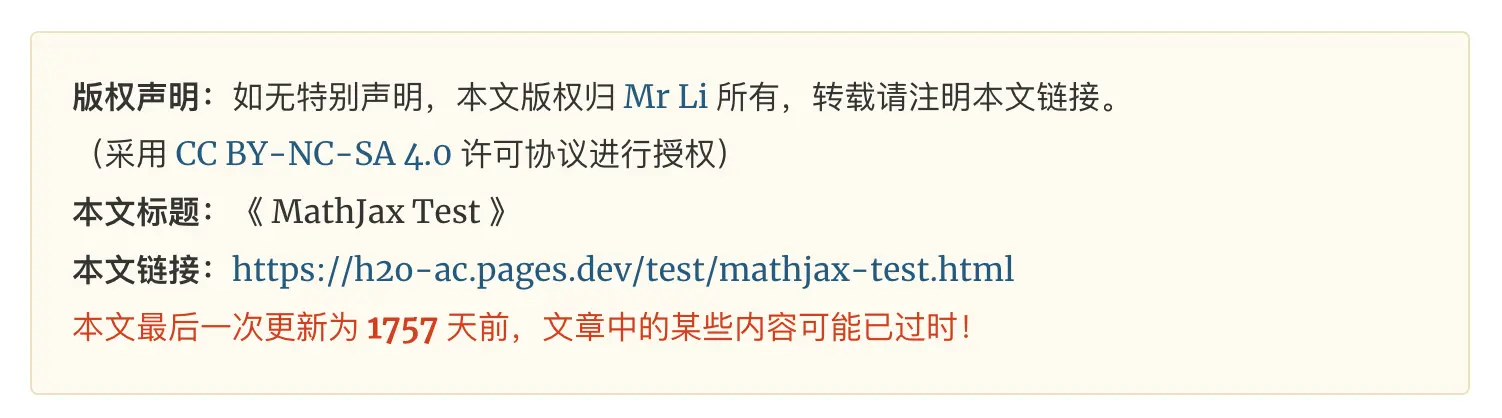
<p>  之前的版本只会在页面底部的信息栏中显示一个 CC 4.0 的小图标，不是很醒目。根据调研其他静态网站主题，发现一般都会在文章的末尾自动生成一个比较醒目的版权声明。另外，在版权声明中也将根据最近更新时间来判断内容是否可能过时。如果最近更新时间距离当前时间大于 365 天，则会显示具体日期并提醒有内容过时的可能。效果如下所示。</p>

<p><img src="https://i.lisz.top/blog/scNRyd.webp" alt="版权显式声明 Copyright" />
<img src="https://i.lisz.top/blog/C8RWtL.webp" alt="内容可能过时提醒 Long time ago notification" /></p>

<h4 id="文章侧边索引导航">文章侧边索引导航</h4>

<p>(2022年1月9日更新)</p>

<p>  在一些基于 Bootstrap 前端框架的 Jekyll 主题中，这个功能比较常见。由于本主题未使用 Bootstrap 前端框架，所以添加起来稍微有些麻烦，现已增加此功能。在浏览器窗口超过 1050 px 的情况下，在文章页面可以正常看到右侧的文章侧边索引导航。当窗口滑动时，侧边索引导航也会跟着滑动。在浏览器窗口不足 1050 px 的情况下，侧边索引导航自动隐藏。在 _config.yml 配置文件中，可以通过设置 <code class="language-plaintext highlighter-rouge">toc: false</code> 来全局禁用此功能。</p>

<p>(2022年4月30日更新)</p>

<p>  在原来的基础上增加了跟随左侧内容滑动高亮。当左侧内容向上或向下滑动时，右侧索引导航将会使对应的对应一级标题高亮。</p>

<p>(2022年5月14日更新)</p>

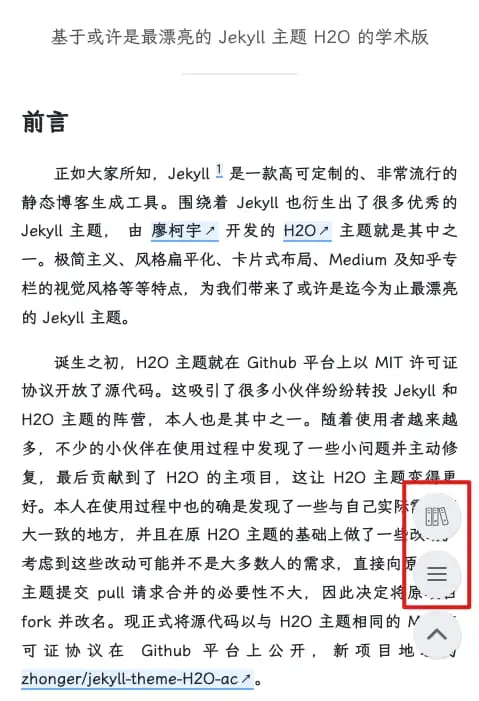
<p>  为文章的移动端页面添加了索引导航按钮。鉴于单页面的内容有限及侧边位置空间有限，暂未对单页面进行支持。</p>

<h4 id="支持-waline-评论系统">支持 Waline 评论系统</h4>

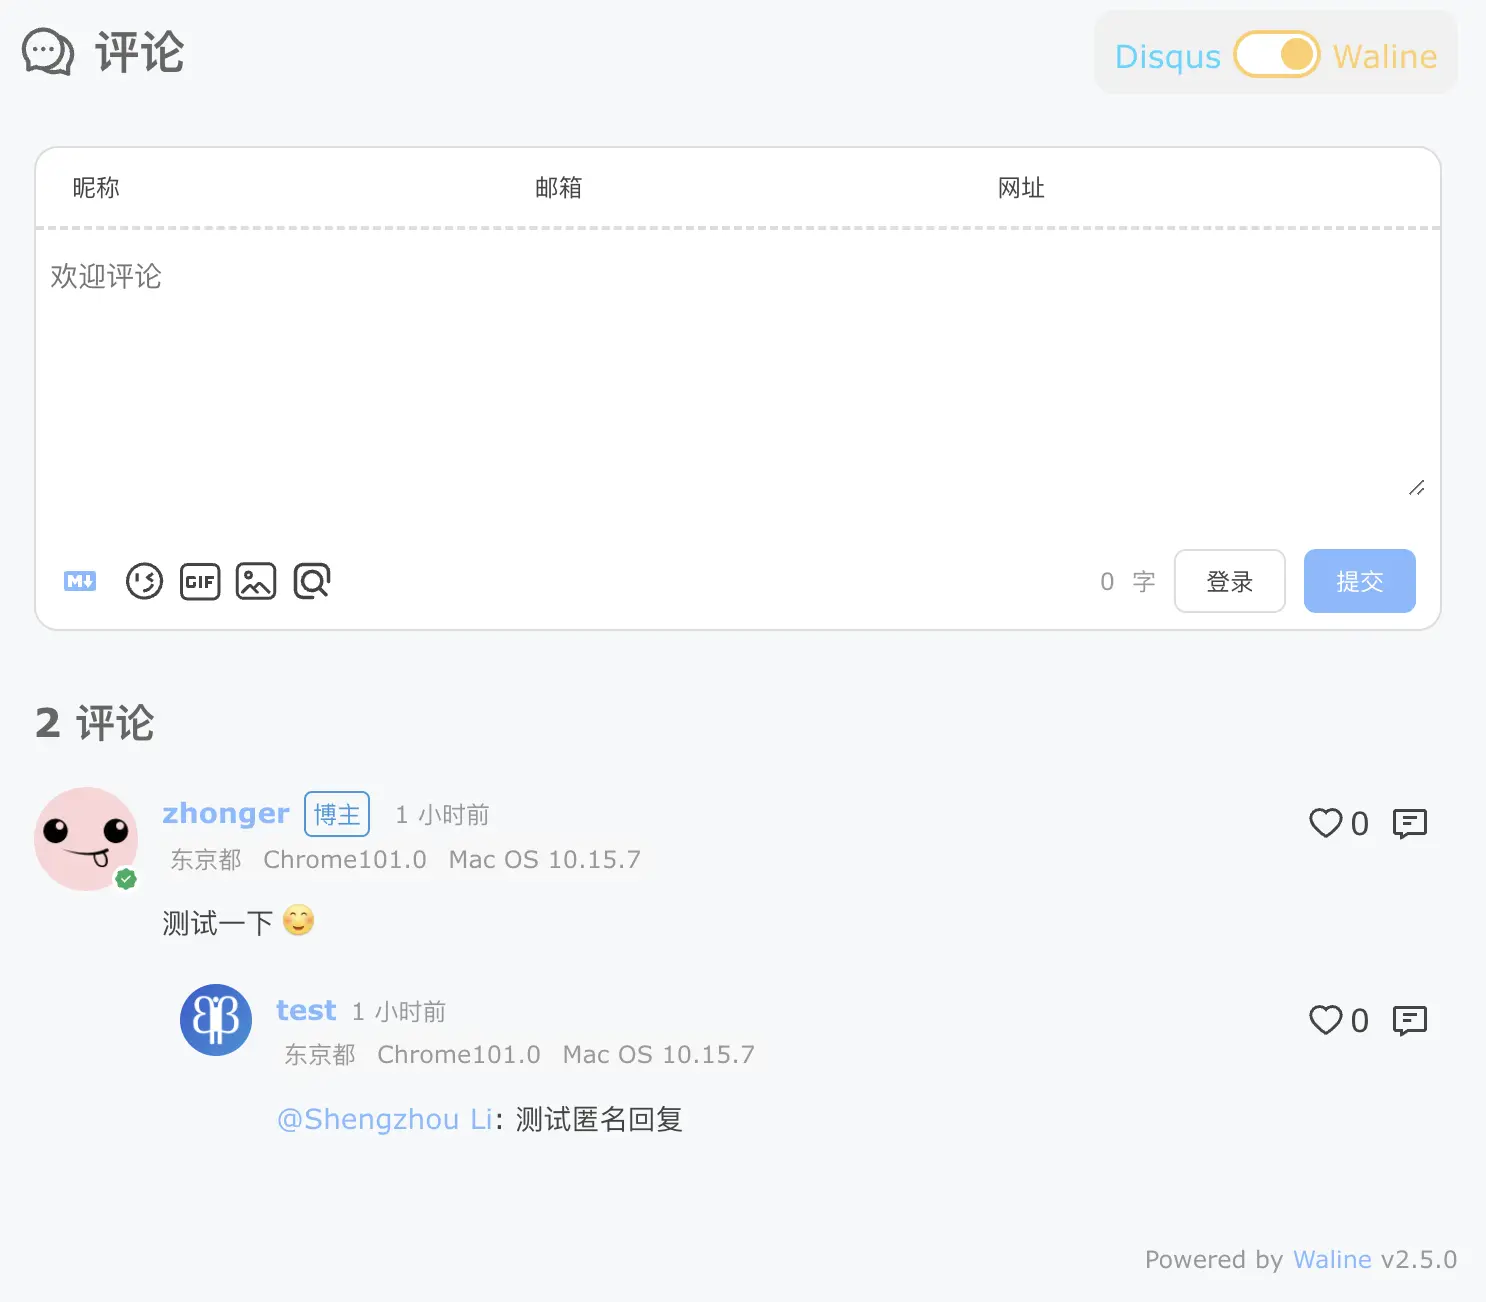
<p>  目前已支持基于 Valine 衍生的简洁、安全的评论系统 Waline。可以根据官方提供的 <a href="https://waline.js.org/guide/get-started.html">快速上手</a> 进行配置，以下为 _config.yml 中需要配置的内容：</p>

<div class="language-yaml highlighter-rouge"><div class="highlight"><pre class="highlight"><code><span class="c1"># _config.yml</span>

<span class="na">comments</span><span class="pi">:</span>
  <span class="na">waline</span><span class="pi">:</span> <span class="kc">true</span>
  <span class="na">waline_url</span><span class="pi">:</span> <span class="s">https://xxxxxx.vercel.app</span>
</code></pre></div></div>

<p>  <del>目前未对多评论系统同时支持进行优化，所以如果 Disqus 和 Waline 同时开启时，Disqus 在前 Waline 在后同时出现。如果用户环境无法访问 Disqus 即只能看到 Waline。</del></p>

<p>(2022年5月22日更新)</p>

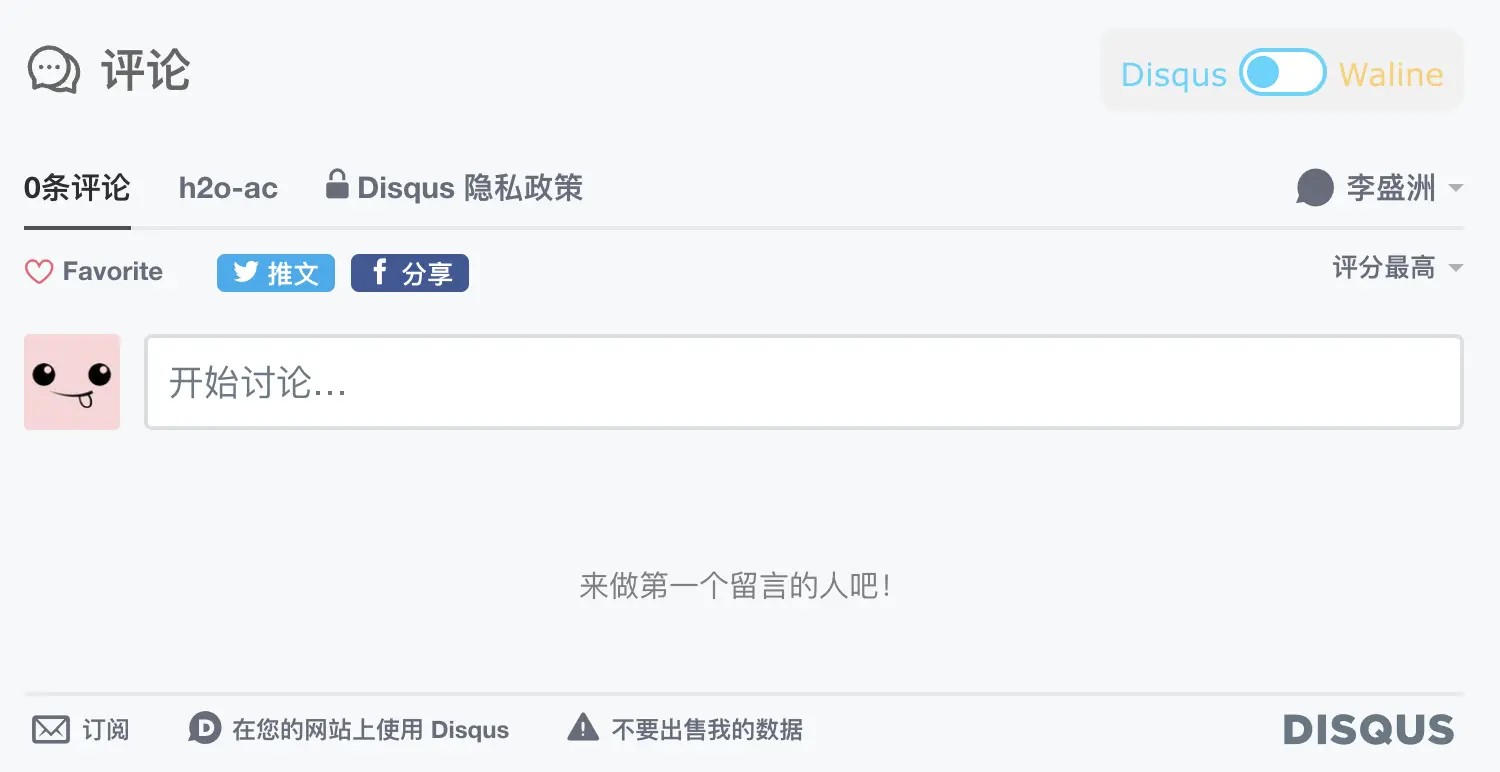
<p>  新增多评论切换按钮：当同时使用 Disqus 和 Waline 时，会在评论区域的右上角看到一个左右滑动切换按钮。如下所示，从左往右滑动即可从 Disqus 切换到 Waline。</p>

<p>  同时修复了手动切换深色模式时 Disqus 不会自动切换模式而造成的显示问题。目前在模式切换时 Disqus 会主动进行重新加载以适应当前模式。</p>

<p><img src="https://i.lisz.top/blog/WBgbUB.webp" alt="Disqus 评论系统 Disqus comment" />
<img src="https://i.lisz.top/blog/45JQ9H.webp" alt="Waline 评论系统 Waline comments" /></p>

<h4 id="支持-pwa">支持 PWA</h4>

<p>(2022年5月11日更新)</p>

<p>  全面支持 PWA，访问速度得到较大提升。移动端访问可以像原生 APP 那样使用。如果访问过全站一遍之后，则可以完全离线使用。如下所示，可以配置 PWA 的主题色和短名称。</p>

<div class="language-yaml highlighter-rouge"><div class="highlight"><pre class="highlight"><code><span class="c1"># PWA</span>
<span class="na">pwa</span><span class="pi">:</span>
  <span class="na">color</span><span class="pi">:</span> <span class="s1">'</span><span class="s">#81BBFF'</span>
  <span class="na">short_name</span><span class="pi">:</span> <span class="s1">'</span><span class="s">lisz'</span>
</code></pre></div></div>

<h4 id="支持-mermaid">支持 Mermaid</h4>

<p>(2022年8月29日更新)</p>

<p>  不少同学可能会有在文章中放置流程图的需求，为了满足这一需求，现添加了 <a href="https://mermaid-js.github.io/mermaid/#/">Mermaid</a> 来支持像写代码一样画图。</p>

<p>  为了兼容 Markdown 语法，这里采用了自定义的代码类型。当代码类型为 <code class="language-plaintext highlighter-rouge">mermaid</code> 时，PrismJS 会自动以代码的形式美化展示；当代码类型为 <code class="language-plaintext highlighter-rouge">mermaid2</code> 时，页面会自动使用 Mermaid 画成图展示出来，如下所示。</p>

<p>  考虑到页面宽度有限，Mermaid 所画出的甘特图等其他比较大一点的图不太好看，也增加了<strong>放大重绘</strong>的功能。如下所示，点击图的右上角的按钮即可全屏查看大图。</p>

<pre><code class="language-mermaid">graph TD;
    A--&gt;B;
    A--&gt;C;
    B--&gt;D;
    C--&gt;D;
</code></pre>

<pre><code class="language-mermaid2">    graph TD;
    A--&gt;B;
    A--&gt;C;
    B--&gt;D;
    C--&gt;D;
</code></pre>

<pre><code class="language-mermaid2">    gantt
      title A Gantt Diagram
      dateFormat x
      axisFormat %L
      section Section
      A task           :a1, 0, 30ms
      Another task     :after a1, 20ms
      section Another
      Another another task      :b1, 20, 12ms
      Another another another task     :after b1, 24ms
</code></pre>

<pre><code class="language-mermaid2">    gantt
    dateFormat  YYYY-MM-DD
    title       Adding GANTT diagram functionality to mermaid
    excludes    weekends
    %% (`excludes` accepts specific dates in YYYY-MM-DD format, days of the week ("sunday") or "weekends", but not the word "weekdays".)

    section A section
    Completed task            :done,    des1, 2014-01-06,2014-01-08
    Active task               :active,  des2, 2014-01-09, 3d
    Future task               :         des3, after des2, 5d
    Future task2              :         des4, after des3, 5d

    section Critical tasks
    Completed task in the critical line :crit, done, 2014-01-06,24h
    Implement parser and jison          :crit, done, after des1, 2d
    Create tests for parser             :crit, active, 3d
    Future task in critical line        :crit, 5d
    Create tests for renderer           :2d
    Add to mermaid                      :1d
    Functionality added                 :milestone, 2014-01-25, 0d

    section Documentation
    Describe gantt syntax               :active, a1, after des1, 3d
    Add gantt diagram to demo page      :after a1  , 20h
    Add another diagram to demo page    :doc1, after a1  , 48h

    section Last section
    Describe gantt syntax               :after doc1, 3d
    Add gantt diagram to demo page      :20h
    Add another diagram to demo page    :48h
</code></pre>

<h4 id="发表日历">发表日历</h4>

<p>(2024年3月27日更新)</p>

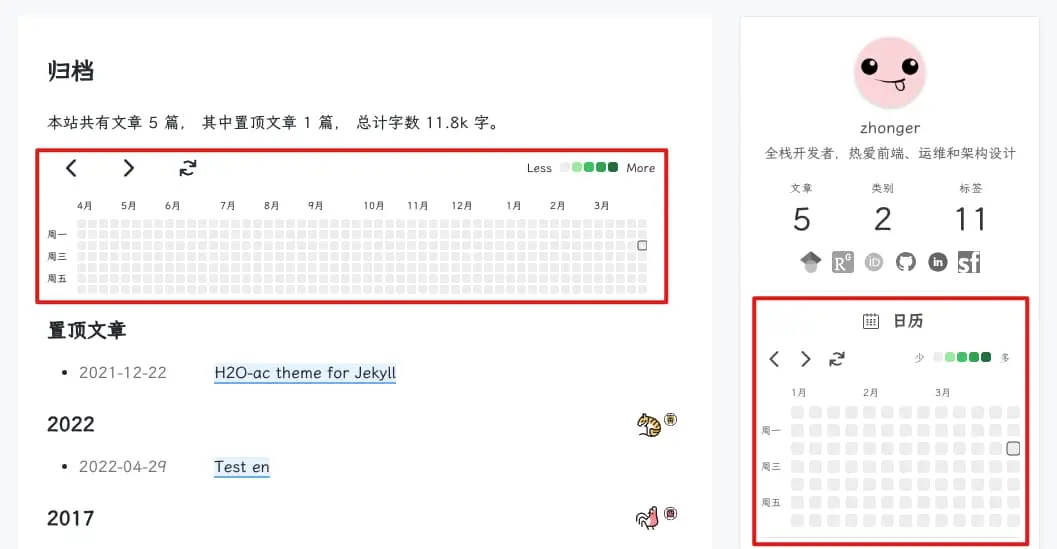
<p>  新增文章发表日历统计功能，类似与 Github 的 commit 日历，如下图所示。主题自 v1.3.0 之后开始支持，并默认开启，如需停用请如下修改配置。日历提供三个按钮：向前、向后、回到今天。除此之外，当鼠标悬浮在小方块时可以看到当天具体的文章贡献数量，目前仅统计发表贡献，后续将增加对更新等贡献的统计。侧边栏日历显示三个月，归档页内日历显示 3~12 个月不等（根据视图宽度自动调整）。</p>

<div class="language-yaml highlighter-rouge"><div class="highlight"><pre class="highlight"><code><span class="c1"># 默认开启</span>
<span class="na">calendar</span><span class="pi">:</span> <span class="kc">true</span>

<span class="c1"># 停用日历功能</span>
<span class="na">calendar</span><span class="pi">:</span> <span class="kc">false</span>
</code></pre></div></div>

<p><img src="https://i.lisz.top/blog/4XUGTS.webp" alt="日历 Calendar" /></p>

<h4 id="系列文章导航">系列文章导航</h4>

<p>(2024年3月27日更新)</p>

<p>  之前的 collection 系列文章是通过标签页实现的，目前新增的是文章页内系列文章导航，如下图所示。本功能自 v1.3.0 之后开始支持。使用方法是：</p>

<p><img src="https://i.lisz.top/blog/bJlpQ3.webp" alt="系列文章导航 submenu" /></p>

<p>首先，在 <code class="language-plaintext highlighter-rouge">_data/collections.yml</code> 文件中准备好如下类似的导航信息：</p>

<div class="language-yaml highlighter-rouge"><div class="highlight"><pre class="highlight"><code><span class="pi">-</span> <span class="na">id</span><span class="pi">:</span> <span class="s1">'</span><span class="s">begin'</span>
  <span class="na">name</span><span class="pi">:</span> <span class="s1">'</span><span class="s">H2O-ac</span><span class="nv"> </span><span class="s">主题入门系列'</span>
  <span class="na">articles</span><span class="pi">:</span>
  <span class="pi">-</span> <span class="na">name</span><span class="pi">:</span> <span class="s1">'</span><span class="s">快速入门'</span>
    <span class="na">url</span><span class="pi">:</span> <span class="s1">'</span><span class="s">/tech/new-theme-h2o-ac.html'</span>
  <span class="pi">-</span> <span class="na">name</span><span class="pi">:</span> <span class="s1">'</span><span class="s">快速入门'</span>
    <span class="na">url</span><span class="pi">:</span> <span class="s1">'</span><span class="s">/tech/new-theme-h2o-ac.html'</span>
  <span class="pi">-</span> <span class="na">name</span><span class="pi">:</span> <span class="s1">'</span><span class="s">快速入门'</span>
    <span class="na">url</span><span class="pi">:</span> <span class="s1">'</span><span class="s">/tech/new-theme-h2o-ac.html'</span>
</code></pre></div></div>

<p>其次，在文章页添加如下元信息：</p>

<div class="language-yaml highlighter-rouge"><div class="highlight"><pre class="highlight"><code><span class="na">submenu</span><span class="pi">:</span> <span class="s1">'</span><span class="s">begin'</span>
</code></pre></div></div>

<p>然后就可以在文章内容左侧看到<strong>文章导航</strong>了。与此同时，当视窗大小不足以显示文章导航时，文章导航会自动隐藏，并显示如下工具按钮。</p>

<p><img src="https://i.lisz.top/blog/3gD7XT.webp" alt="工具按钮 toolb buttons" /></p>

<div class="premonition note"> <div class="header"> <svg class="icon note" aria-hidden="true"> <use xlink:href="#icon-note"></use> </svg> <div class="title"> 注意 </div> </div> <div class="content"> <p>  TOC（文章目录导航）与系列文章导航工具按钮均是根据视窗大小自适应隐藏或显示，并支持夜间模式。</p>


 </div> </div>
<div class="premonition warning"> <div class="header"> <svg class="icon warning" aria-hidden="true"> <use xlink:href="#icon-warning"></use> </svg> <div class="title"> 提示 </div> </div> <div class="content"> <p>  目前仅支持站内链接，且自动根据配置增加链接前缀。</p>


 </div> </div>
<h4 id="配置项">配置项</h4>

<p>  配置项中新增了<strong>友情链接</strong>和<strong>备案号</strong>功能，可以直接在 _config.yml 文件的对应配置项下设置即可，如下所示。友情链接主要是方便跟其他博主交换友链，备案号主要是为了方便部署在国内需备案的 vps 或虚拟主机上。此处，二者都可以置空。</p>

<p>(2022年4月30日更新)</p>

<p>  新增<strong>全站一键灰度化功能</strong>、<strong>时间格式</strong>配置。在国家公祭日等需要灰度化以示哀悼的时候可以将灰度化配置设置为 true，平常使用默认配置 false。时间格式这里一共提供了 3 种：第一种中英文站点使用皆宜，第二种适用于英文站点，第三种适用于中文站点。默认时间格式为第一种。</p>

<p>(2022年5月14日更新)</p>

<p>  新增 <a href="https://busuanzi.ibruce.info/"><strong>不蒜子</strong></a> 统计方式，可以显示全站访问次数、全站访问用户数、文章页面阅读量。如下设置可以开启。</p>

<p>(2022年5月16日更新)</p>

<p>  新增 <a href="https://github.com/mikecao/umami"><strong>umami</strong></a> 统计方式，需要自行先搭建 umami 然后接入。接入配置只需要如下所示配置跟踪 id 和 JS 脚本地址。</p>

<div class="language-yaml highlighter-rouge"><div class="highlight"><pre class="highlight"><code><span class="c1"># Links 友情链接</span>
<span class="na">links</span><span class="pi">:</span>
  <span class="s1">'</span><span class="s">Mr</span><span class="nv"> </span><span class="s">Li'</span><span class="err">:</span> <span class="s1">'</span><span class="s">https://lisz.me'</span>

<span class="c1"># Beian 备案号</span>
<span class="na">beian</span><span class="pi">:</span> <span class="s1">'</span><span class="s">沪ICP备xxxxxxxx号'</span>

<span class="c1"># Gray 灰度化</span>
<span class="na">gray</span><span class="pi">:</span> <span class="kc">true</span>

<span class="c1"># Time format 时间格式 </span>
<span class="c1"># 0 -- 2022-04-29    1 -- 29 Apr 2022   2 -- 2022年4月29日</span>
<span class="na">formats</span><span class="pi">:</span>
  <span class="na">time</span><span class="pi">:</span> <span class="s">0</span> 

<span class="c1"># Busuanzi Analytics</span>
<span class="na">busuanzi</span><span class="pi">:</span> <span class="kc">true</span>

<span class="c1"># Umami Analytics</span>
<span class="na">umami</span><span class="pi">:</span>
  <span class="na">status</span><span class="pi">:</span> <span class="kc">true</span>
  <span class="na">id</span><span class="pi">:</span> <span class="s">xxxxxxxxxxxxx</span>
  <span class="na">js</span><span class="pi">:</span> <span class="s">https://umami.example.com/umami.js</span>
</code></pre></div></div>

<h4 id="前端自动构建工作流优化">前端自动构建工作流优化</h4>

<p>  H2O 主题中使用了 Gulp + <del>Node-Sass</del> Sass 的方案来自动化前端构建工作流。不得不说，这个方案还是很不错的，只是随着 Gulp 和 <del>Node-Sass</del> Sass 版本的更新，对 NodeJS 环境及其他依赖库都有一些要求。这里，H2O-ac 主题在 package.json 文件中将所有库都更新到目前最新，对应版本列表如下所示。另外，为了减少一些第三方 CSS 样式的请求数，利用自动构建工作流将固定的第三方 CSS 样式文件合并并压缩为 plugins.min.css 文件。app.min.css 仍为多个自编写 CSS 样式文件的合并压缩。</p>

<table>
  <thead>
    <tr>
      <th style="text-align: center">运行环境或依赖库</th>
      <th style="text-align: center">版本号</th>
    </tr>
  </thead>
  <tbody>
    <tr>
      <td style="text-align: center">NodeJS</td>
      <td style="text-align: center">v17.0.0</td>
    </tr>
    <tr>
      <td style="text-align: center">gulp</td>
      <td style="text-align: center">v4.0.2</td>
    </tr>
    <tr>
      <td style="text-align: center">gulp-clean-css</td>
      <td style="text-align: center">v4.3.0</td>
    </tr>
    <tr>
      <td style="text-align: center">gulp-rename</td>
      <td style="text-align: center">v20.0</td>
    </tr>
    <tr>
      <td style="text-align: center">gulp-sass</td>
      <td style="text-align: center">v5.0.0</td>
    </tr>
    <tr>
      <td style="text-align: center">gulp-uglify</td>
      <td style="text-align: center">v3.0.2</td>
    </tr>
    <tr>
      <td style="text-align: center">gulp-concat</td>
      <td style="text-align: center">v2.6.1</td>
    </tr>
    <tr>
      <td style="text-align: center"><del>node-sass</del></td>
      <td style="text-align: center"><del>v7.0.0</del></td>
    </tr>
    <tr>
      <td style="text-align: center">sass</td>
      <td style="text-align: center">v1.51.0</td>
    </tr>
  </tbody>
</table>

<h2 id="使用方法">使用方法</h2>

<h3 id="初始化">初始化</h3>

<h4 id="方式一从模板新建博客">方式一：从模板新建博客</h4>

<p>  为了方便用户使用 H2O-ac 主题，特别提供了 Github 的模板功能。如下图所示，访问 <a href="https://github.com/zhonger/jekyll-theme-H2O-ac">H2O-ac</a> 可以看到如下的 Use this template 按钮，点击该按钮即可用 H2O-ac 主题创建自己的博客代码仓库。想要了解更多步骤，可以访问 Github 官方文档之 <a href="https://docs.github.com/cn/repositories/creating-and-managing-repositories/creating-a-repository-from-a-template">从模板创建仓库</a>。</p>

<p><img src="https://i.lisz.top/blog/oHHZZh.webp" alt="从模板新建 Start the blog from the template" /></p>

<h4 id="方式二已有博客迁移">方式二：已有博客迁移</h4>

<p>  <del>暂时无法支持 gem 直接切换主题，后续将更新此方式。目前只能使用方式一创建仓库后，将文章的 markdown 文件复制到 _posts 目录下应用 H2O-ac 主题。</del></p>

<p>(2021年12月26日更新)</p>

<p>  现已支持使用 gem 直接切换主题 <code class="language-plaintext highlighter-rouge">jekyll-theme-h2o-ac</code>。同时，也推出了一键式构建工具 <a href="https://github.com/zhonger/easy-to-h2o-ac">easy-to-h2o-ac</a>，详细可以见项目主页。</p>

<h3 id="本地测试">本地测试</h3>

<p>  在进行本地测试时，如果需要修改一些样式，则需要先执行 <code class="language-plaintext highlighter-rouge">npm install</code> 来完成前端自动构建工作流依赖库的安装。注意，这里设定的可用 NodeJS 版本为 v17.0.0，使用老版本会报错。其次，务必使用 <code class="language-plaintext highlighter-rouge">bundle install</code> 安装主题所需的所有 Ruby 依赖库。最后执行 <code class="language-plaintext highlighter-rouge">bundle exec jekyll serve --livereload</code> 命令即可在本地实时同步预览。只要不修改 _config.yml 文件，不必中断后再启动。然后就是在 <code class="language-plaintext highlighter-rouge">_posts</code> 目录下写 markdown 文章即可。</p>

<h3 id="发布部署">发布部署</h3>

<p>  由于 Github 提供 Jekyll 静态生成器的静态页面托管，只要打开仓库的 Pages 功能，当推送更新到 Github 时即会自动部署。此处值得注意的是，如果代码仓库的名字不是 <code class="language-plaintext highlighter-rouge">username.github.io</code>，而也没有为该仓库的 Pages 提供自定义域名，那么这个仓库将会被部署到子目录，因此此时必须在 _config.yml 文件中设置 base_url，从而生成正常的静态页面。</p>

<h2 id="结束语">结束语</h2>

<p>  再次感谢廖柯宇及其他小伙伴们对 H2O 主题的付出，没有 H2O 主题就没有 H2O-ac 主题！H2O-ac 主题后续也将继续更新，欢迎小伙伴们使用和 <a href="https://github.com/zhonger/jekyll-theme-H2O-ac">Star</a>，也欢迎大家一起来贡献代码。</p>

<p>（Ps: <del>由于沿用了 H2O 的 Logo，可能会侵犯廖柯宇的版权。如果的确如此，后续将会设计一个新的 Logo。</del> 已采用新 Logo。）
（2022年1月10日更新）</p>

<div class="footnotes" role="doc-endnotes">
  <ol>
    <li id="fn:1">
      <p>Jekyll 商标归 Jekyll 项目所有。 <a href="#fnref:1" class="reversefootnote" role="doc-backlink">&#8617;</a></p>
    </li>
  </ol>
</div>]]></content><author><name>zhonger</name></author><category term="tech" /><category term="jekyll" /><category term="theme" /><category term="blog" /><category term="ac" /><category term="develop" /><category term="主题" /><category term="前端开发" /><category term="学术" /><category term="运维" /><summary type="html"><![CDATA[前言]]></summary></entry><entry><title type="html">MathJax Test</title><link href="https://h2o-ac.pages.dev/test/mathjax-test.html" rel="alternate" type="text/html" title="MathJax Test" /><published>2017-07-30T00:00:00+00:00</published><updated>2017-07-30T00:00:00+00:00</updated><id>https://h2o-ac.pages.dev/test/mathjax-test</id><content type="html" xml:base="https://h2o-ac.pages.dev/test/mathjax-test.html"><![CDATA[<p>mathjax in markdown :)</p>

<p><strong>这是一个不<code class="language-plaintext highlighter-rouge">align</code>的公式</strong>：</p>

\[\forall \alpha \in A, \quad a \cdot b = 0\]

<p><strong>这是一个<code class="language-plaintext highlighter-rouge">align</code>的公式</strong>：</p>

\[\begin{align}
    \Phi(0,x) = \max_{u \in \mathcal{D}} \bigg[
        \mathbb{E} &amp; \Phi\left(1, 
        x + \int_0^1 \sigma^2(s) \, \zeta(s) \, u_s \, ds
        + \int_0^1 \sigma(s) \, dW_s
    \right) \\
        &amp;- \frac{1}{2} \int_0^1 \sigma^2(s) \, \zeta(s) \,
        \mathbb{E} u_s^2  \, ds
    \bigg].
\end{align}\]

<p><strong>注意：</strong>公式块要想有较好的显示效果，必须在公式块标记符<code class="language-plaintext highlighter-rouge">$$</code><strong>前后</strong>留有空行，否则公式将不能正常居中。行内公式无此问题。</p>]]></content><author><name>zhonger</name></author><category term="test" /><category term="mathjax" /><summary type="html"><![CDATA[mathjax in markdown :)]]></summary></entry><entry><title type="html">Hello Jekyll</title><link href="https://h2o-ac.pages.dev/hello-jekyll.html" rel="alternate" type="text/html" title="Hello Jekyll" /><published>2017-04-18T00:00:00+00:00</published><updated>2017-04-18T00:00:00+00:00</updated><id>https://h2o-ac.pages.dev/hello-jekyll</id><content type="html" xml:base="https://h2o-ac.pages.dev/hello-jekyll.html"><![CDATA[<blockquote>
  <p>Transform your plain text into static websites and blogs.</p>
</blockquote>

<h3 id="welcome">Welcome</h3>

<p>This site aims to be a comprehensive guide to Jekyll. We’ll cover topics such as getting your site up and running, creating and managing your content, customizing the way your site works and looks, deploying to various environments, and give you some advice on participating in the future development of Jekyll itself.</p>

<h3 id="so-what-is-jekyll-exactlypermalink">So what is Jekyll, exactly?Permalink</h3>

<p>Jekyll is a simple, blog-aware, static site generator. It takes a template directory containing raw text files in various formats, runs it through a converter (like <a href="https://daringfireball.net/projects/markdown/">Markdown</a>) and our <a href="https://github.com/Shopify/liquid/wiki">Liquid</a> renderer, and spits out a complete, ready-to-publish static website suitable for serving with your favorite web server. Jekyll also happens to be the engine behind GitHub Pages, which means you can use Jekyll to host your project’s page, blog, or website from GitHub’s servers for free.</p>

<h3 id="helpful-hintspermalink">Helpful HintsPermalink</h3>

<p>Throughout this guide there are a number of small-but-handy pieces of information that can make using Jekyll easier, more interesting, and less hazardous. Here’s what to look out for.</p>

<h3 id="video-test">Video Test</h3>

<iframe type="text/html" width="100%" height="385" src="https://www.youtube.com/embed/gfmjMWjn-Xg" frameborder="0"></iframe>]]></content><author><name>Jekyll</name></author><category term="jekyll" /><summary type="html"><![CDATA[Transform your plain text into static websites and blogs.]]></summary></entry><entry><title type="html">H2O theme for Jekyll</title><link href="https://h2o-ac.pages.dev/tech/new-theme-h2o.html" rel="alternate" type="text/html" title="H2O theme for Jekyll" /><published>2017-04-18T00:00:00+00:00</published><updated>2017-04-18T00:00:00+00:00</updated><id>https://h2o-ac.pages.dev/tech/new-theme-h2o</id><content type="html" xml:base="https://h2o-ac.pages.dev/tech/new-theme-h2o.html"><![CDATA[<p>正如我在<a href="http://weibo.com/1374146504/profile?topnav=1&amp;wvr=6">微博</a>上所说的，使用<a href="http://jekyll.com.cn/">Jekyll</a>半年以来一直没有令我满意的主题模板，所以开始计划自己写一套好看又好用的主题模板。设计之初就明确了极简主义，风格采用扁平化了，通过卡片式设计来进行区块分明的布局，参考了Medium的ui样式和知乎专栏的视觉风格。</p>

<h2 id="h2o">H2O</h2>

<p><a href="https://github.com/kaeyleo/jekyll-theme-H2O">源码及使用文档 →</a></p>

<p><img src="http://on2171g4d.bkt.clouddn.com/jekyll-theme-h2o-realhome.jpg" alt="" /></p>

<p>新主题名叫”H2O”，基于Jekyll 3.0.x（使用<code class="language-plaintext highlighter-rouge">gem update jekyll</code>升级Jekyll），Markdown的代码高亮不再支持pygments转而使用rouge，咱已经默认配置了 <code class="language-plaintext highlighter-rouge">highlighter: rouge</code> 。用到的技术栈也很简单：引入jQuery类库，使用Sass编写样式，使用Gulp来编译Sass、合并压缩css、js，开源在<a href="https://github.com/kaeyleo/jekyll-theme-H2O">Github</a>上，稍作配置即可用于你的Jekyll博客上。</p>

<p><img src="http://on2171g4d.bkt.clouddn.com/jekyll-theme-h2o-sketchdesign.png" alt="Design with Sketch" /></p>

<p>使用Sketch完成H2O主题的原型设计</p>

<p><img src="http://on2171g4d.bkt.clouddn.com/jekyll-theme-vs.jpg" alt="My Jekyll themes" /></p>

<p>比之前漂亮不少吧，下面聊聊H2O的新特性。</p>

<h2 id="新特性">新特性</h2>

<h3 id="主题配色">主题配色</h3>

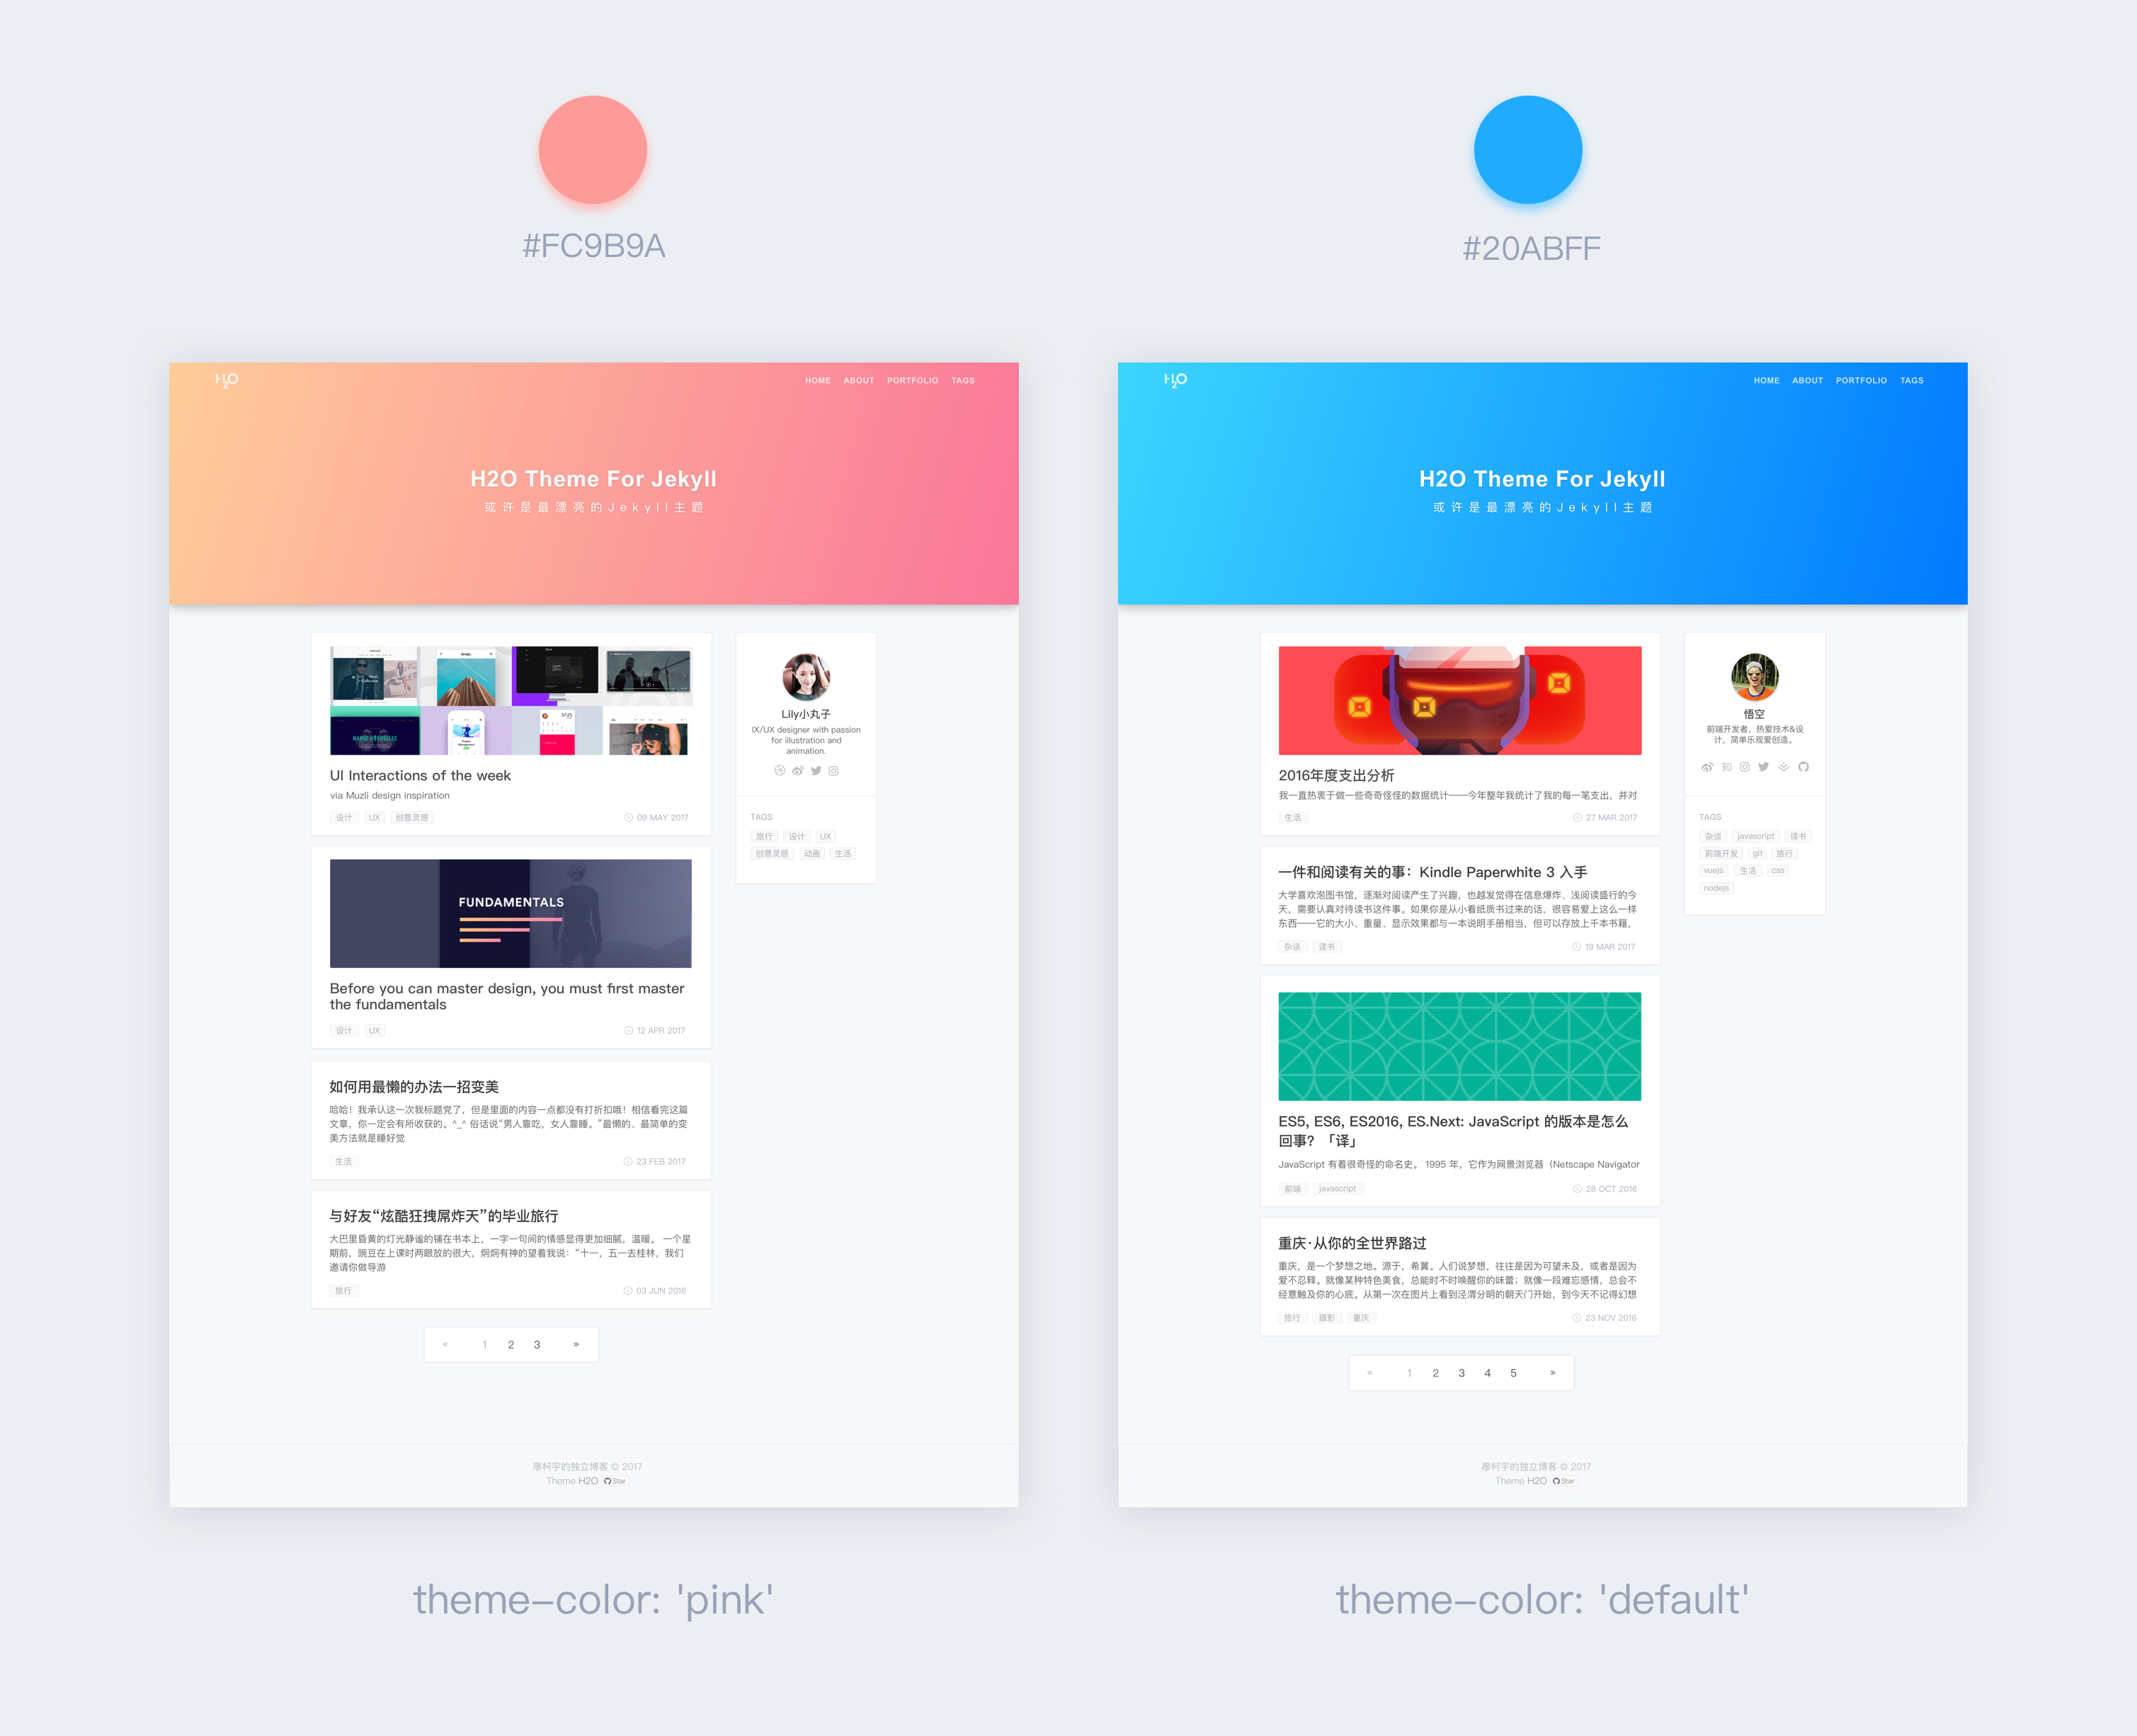
<p>支持两种主题配色——蓝色和粉色。</p>

<p><img src="https://github.com/kaeyleo/jekyll-theme-H2O/blob/master/screenshot/jekyll-theme-h2o-themecolor.jpg?raw=true" alt="" /></p>

<h3 id="侧边栏">侧边栏</h3>

<p>相比自己上一个版本的博客主题，首页增加了侧边栏，方便展示博主的个人信息和文章标签。</p>

<h3 id="社交图标">社交图标</h3>

<p>使用阿里的图标管理平台<a href="http://iconfont.cn/">Iconfont</a>整理了一套<strike>墙内外</strike>常用的社交图标，包括微博、知乎、掘金、简书、Github等十多个网站，鼠标悬停会显示该站的主题色。</p>

<p><img src="http://on2171g4d.bkt.clouddn.com/jekyll-theme-h2o-snstext.jpg" alt="social iconfont" /></p>

<h3 id="前后文导航">前后文导航</h3>

<p><img src="http://on2171g4d.bkt.clouddn.com/jekyll-theme-h2o-nextpostnav.png" alt="Next post navigator" /></p>

<h3 id="自定义文章封面">自定义文章封面</h3>

<p>在Markdown的<a href="http://jekyll.com.cn/docs/frontmatter/">文章头信息</a>里添加cover参数来配置文章的封面图片，如果没有配置封面，则默认【主题色+底纹】的组合作为文章封面。值得一提的是，H2O有两种（粉、蓝）主题色和六种底纹（电路板、食物、云海、钻石等等）供你选择。</p>

<h3 id="头图个性化底纹">头图个性化底纹</h3>

<p>在没有图片的情况下单纯显示颜色会不会太无趣了点？于是想到了加入底纹元素，底纹素材是SVG格式的（保存在css样式里），加载比图片快很多。</p>

<p><img src="http://on2171g4d.bkt.clouddn.com/jekyll-theme-h2o-headerpatterns.jpg" alt="" /></p>

<h3 id="代码高亮">代码高亮</h3>

<p>模板引入了<a href="http://prismjs.com">Prism.js</a>，一款轻量、可扩展的代码语法高亮库。</p>

<p>很多知名网站如<a href="https://developer.mozilla.org/">MDN</a>、<a href="https://css-tricks.com/">css-tricks</a>也在用它，JavaScript 之父 <a href="https://brendaneich.com/">Brendan Eich</a> 也在个人博客上使用。</p>

<p><img src="http://on2171g4d.bkt.clouddn.com/jekyll-theme-h2o-highlight.png" alt="代码高亮" /></p>

<p>遵循 <a href="https://www.w3.org/TR/html5/grouping-content.html#the-pre-element">HTML5</a> 标准，Prism 使用语义化的 <code class="language-plaintext highlighter-rouge">&lt;pre&gt;</code> 元素和 <code class="language-plaintext highlighter-rouge">&lt;code&gt;</code> 元素来标记代码区块：</p>

<div class="language-markdown highlighter-rouge"><div class="highlight"><pre class="highlight"><code><span class="nt">&lt;pre&gt;&lt;code</span> <span class="na">class=</span><span class="s">"language-css"</span><span class="nt">&gt;</span>p { color: red }<span class="nt">&lt;/code&gt;&lt;/pre&gt;</span>
</code></pre></div></div>

<p>在Markdown中你可以这样写：</p>

<div class="language-markdown highlighter-rouge"><div class="highlight"><pre class="highlight"><code><span class="p">```</span><span class="nl">css
</span><span class="nt">p</span> <span class="p">{</span> <span class="nl">color</span><span class="p">:</span> <span class="nx">red</span> <span class="p">}</span>
<span class="p">```</span>
</code></pre></div></div>

<p>支持语言：</p>

<ul>
  <li>HTML</li>
  <li>CSS</li>
  <li>Sass</li>
  <li>JavaScript</li>
  <li>CoffeeScript</li>
  <li>Java</li>
  <li>C-like</li>
  <li>Swift</li>
  <li>PHP</li>
  <li>Go</li>
  <li>Python</li>
</ul>

<h3 id="第三方评论">第三方评论</h3>

<p>由于多说关闭，又对国内其他第三方评论插件无感，所以将<a href="https://disqus.com/">Disqus</a>列为首选（目前模板也只提供了这个），请自备梯子。</p>

<h3 id="移动端优化">移动端优化</h3>

<p>响应式设计，对手机和平板等移动设备做了优化。</p>

<p><img src="http://on2171g4d.bkt.clouddn.com/jekyll-theme-h2o-realm.png" alt="" /></p>

<h3 id="关于阅读体验">关于阅读体验</h3>

<p>我认为在内容质量相同的情况下，出色的沉浸式阅读体验是博客的核心。</p>

<p>H2O在这方面还有很多需要完善的地方，比如：<strike>代码高亮</strike>、夜间模式、查看大图…</p>

<h3 id="其他特性">其他特性：</h3>

<ul>
  <li>网页标题SEO优化</li>
  <li>标签索引，点击标签跳转到标签目录，即可查看对应的全部文章</li>
  <li>漂亮</li>
  <li>好看</li>
  <li>美</li>
</ul>

<h2 id="最后">最后</h2>

<p>本想趁这次机会将整站https化的，但折腾了半天发现弹性web托管并不支持，所以暂时搁置https的想法。另外，博客统计工具一直使用的是<a href="https://tongji.baidu.com">百度统计</a>，这次新增了Google Analytics。</p>

<p>这次从0到1，独自设计、开发再到发布大约用了一周时间，也算完成一个小小的开源项目了，后续也将持续完善和更新，欢迎<a href="https://github.com/kaeyleo/jekyll-theme-H2O">Star</a>。</p>]]></content><author><name>kaeyleo</name></author><category term="tech" /><category term="jekyll" /><category term="前端开发" /><category term="设计" /><summary type="html"><![CDATA[正如我在微博上所说的，使用Jekyll半年以来一直没有令我满意的主题模板，所以开始计划自己写一套好看又好用的主题模板。设计之初就明确了极简主义，风格采用扁平化了，通过卡片式设计来进行区块分明的布局，参考了Medium的ui样式和知乎专栏的视觉风格。]]></summary></entry></feed>